Author: Christophe

  • What is Generative Engine Optimization (GEO)?

    What is Generative Engine Optimization (GEO)?

    It is not just about keywords anymore

    Traditional SEO focuses on keywords to rank a web page in a list of blue links. GEO focuses on context and facts to become the direct answer provided by AI tools like ChatGPT, Claude, and Google’s AI Overviews. You want the AI to read your content and trust it enough to summarize it for the user.

    It relies on “Entities” rather than phrases

    Search engines now look for connections between things, people, and places. These are called entities. If you write about “WordPress hosting,” the AI looks for proof that your business is a connected, trusted entity in that field. It checks who mentions you and what facts you publish.

    Why does this matter for your website?

    People ask questions differently now

    Users act differently with AI. They ask complex, conversational questions. Instead of searching “web design Sheffield,” they ask, “Who is a reliable web developer in Sheffield for a small business?” If your site does not answer that specific question clearly, the AI will ignore you.

    Zero-click searches are increasing

    Many users never click a website link anymore. They get the answer directly from the AI or Google results page. If you optimize for this, your brand name still appears as the source. This builds trust even if you do not get the click immediately.

    Strategy 1: Structure your data clearly

    This is the technical “how-to” section. It focuses on making it easy for machines to read the site.

    Use Schema markup everywhere

    Schema is code that helps search engines understand what your content is. It tells the AI, “This is a price,” “This is a review,” or “This is an author.” You must use JSON-LD schema on your pages. This gives the Large Language Model (LLM) confidence that your data is factual.

    Format content for direct answers

    LLMs love clear structure. When you write a blog post, ask a question in a heading and answer it immediately in the first paragraph. Use bullet points and numbered lists. This formatting makes it easy for the AI to grab your content and serve it as a direct answer.

    Strategy 2: Build real authority

    Opinions and experience count

    AI models are trained on massive amounts of generic text. They value unique, human perspectives because they cannot generate them on their own. You should include specific examples of problems you solved for clients. Use phrases like “In our experience” or “We found that.”

    Get cited by other trusted sources

    LLMs determine truth by looking at consensus. If reputable sites mention your business or link to your articles, the AI trusts you more. You need to focus on digital PR and getting your brand mentioned in industry-relevant publications.

    Strategy 3: Focus on clarity and simplicity

    Cut the fluff

    Complex sentences confuse language models. They consume “tokens” (processing power) without adding value. You should write in short, punchy sentences. If an AI understands your content easily, it is more likely to use it as a source.

    Update your old content

    Information changes fast. LLMs try to provide the most current answer. You must review your old blog posts and update facts, dates, and technical details. A site that stays fresh signals to the AI that it is still in business and relevant.

    Is traditional SEO dead?

    This is not the time to stop doing normal SEO. We still need fast loading speeds and good mobile design. GEO is just a new layer on top. It ensures you remain visible as search engines evolve into answer engines.

    Let’s start with the basics

    You do not need to rewrite your whole site today. Start by adding Schema markup and answering common client questions clearly in your blog. This puts you ahead of most competitors who are still just stuffing keywords into paragraphs.

    Let’s plan your GEO & SEO strategy

    For more information about GEO or SEO get in touch with us here at Seven Creative

  • Making a living as a content creator in 2026? The Kevin Kelly’s 1,000 True Fans still has lots to teach

    Making a living as a content creator in 2026? The Kevin Kelly’s 1,000 True Fans still has lots to teach

    In 2008, Kevin Kelly wrote an essay that changed the career path for thousands of creators. He argued that you do not need mainstream fame to be successful. You do not need to be a household name or a “star.” You only need 1,000 true fans.

    What defines a true fan?

    A true fan is a person who buys everything you produce. They will drive 200 miles to hear you sing. They buy the hardback, the paperback, and the audiobook. They have a Google Alert for your name. According to Kelly, “If you have roughly 1,000 true fans, you can make a living.”

    The math behind the theory

    The math is direct and practical. If you earn $100 in profit from each true fan every year, you have a $100,000 annual income. This is enough for most creators to support themselves.

    The internet makes this possible because it allows for a direct relationship. You no longer need to give a huge percentage of your earnings to a publisher, a record label, or a studio. You keep the profit.

    The shift to micro-communities

    In 2024 and 2025, we saw a massive shift toward “micro-communities.” Data shows that engagement rates for creators with smaller, dedicated audiences are often 10% higher than those with millions of casual followers. People are tired of big algorithms. They want real connection.

    “The future of the creator economy is about depth, not breadth,” says creative strategist Li Jin. This supports Kelly’s original idea that niche success is more sustainable than viral fame.

    Why you should focus on the “Long Tail”

    The internet is built for the “long tail.” This means that even if your interest is very specific—like 19th-century clock repair or indie pixel art—there are enough people on earth to support you. You just need to find them.

    When you focus on 1,000 people, your marketing becomes easier. You don’t have to please everyone. You only have to please your fans.

    FAQ

    Is 1,000 a literal number? No. It is a target. Depending on your expenses, you might only need 500 fans, or you might need 2,000.

    How do I find these fans? Focus on quality. Create things that a small group of people will love, rather than something a large group will just “like.”

    Can I use social media to find them? Yes, but don’t rely on it. Use social media to find people, then move them to a platform you own, like an email list.

    Does this work for teams? If you have a team, you will need more fans. The 1,000 fans rule is designed for a solo creator to earn a living wage.

    What if my profit per fan is low? Then you need more fans. If you only make $10 per fan, you would need 10,000 fans to reach the same $100,000 goal.

    Should I quit my job once I hit 100 fans? Probably not. Use those 100 fans to test if your business model works before relying on it fully.

    { “@context”: “https://schema.org”, “@type”: “Article”, “headline”: “Making a living as a content creator in 2026? The Kevin Kelly’s 1,000 True Fans still has lots to teach”, “author”: { “@type”: “Person”, “name”: “Gemini” }, “datePublished”: “2026-02-06”, “description”: “An analysis of Kevin Kelly’s 1,000 True Fans theory and why it remains relevant in 2026.” }
  • How to enable the WordPress Media Trash

    How to enable the WordPress Media Trash

    Something you’ll be glad you did if you ever delete images by accident!

    If you’ve ever accidentally deleted a vital image or document from your WordPress Media Library, only to realise there is no “Undo” button or site backup, you’ll know how it feels. By default, WordPress permanently deletes media files the second you click that red link.

    However, you can add a safety net—a Trash folder for your media—with one simple line of code.

    Why Enable the Media Trash?

    In a standard WordPress installation, posts and pages have a “Trash” status, allowing you to recover them for up to 30 days. Curiously, the Media Library does not share this behavior out of the box.

    By activating the Media Trash, you get:

    • A Safety Buffer: No more accidental permanent deletions.
    • Consistency: Your media workflow will match your post/page workflow.
    • Peace of Mind: You can audit what is being deleted before it vanishes from the server forever.

    Tutorial: How to Activate the Media Trash

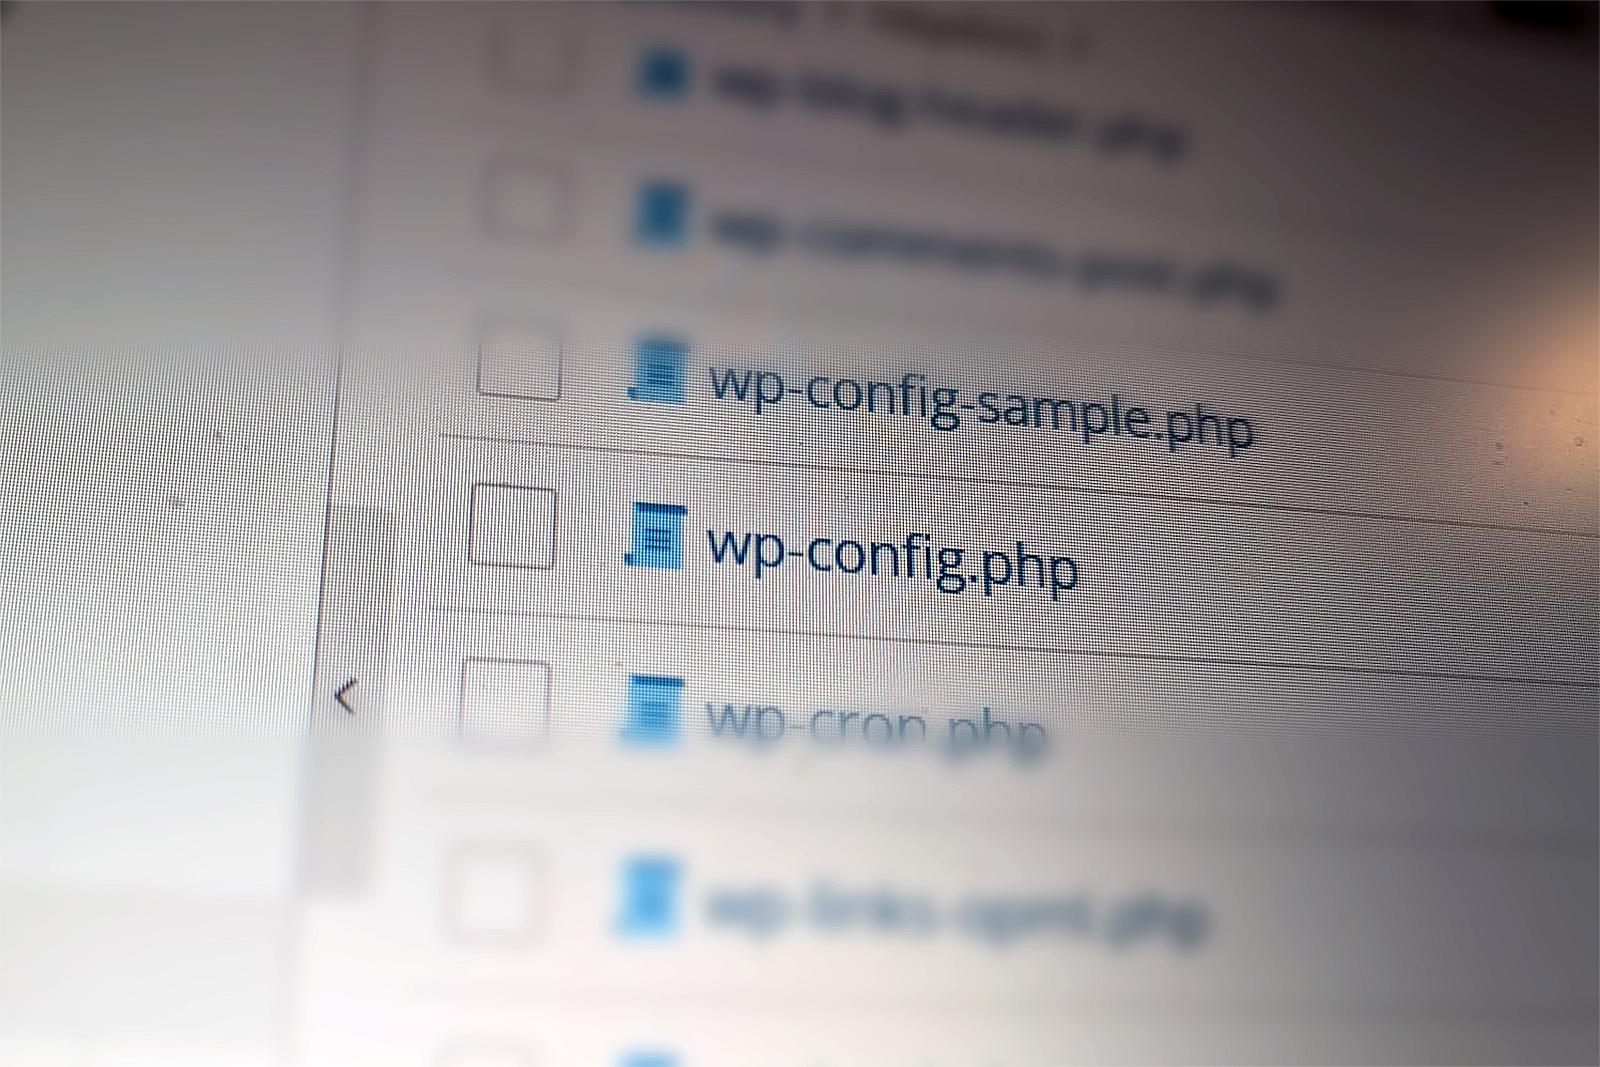
    To enable this feature, we need to edit your wp-config.php file. This is located in your root directory.

    Step 1: Access Your Site Files

    Log in to your website using an FTP client (like FileZilla) or the File Manager provided by your hosting control panel

    Step 2: Locate wp-config.php

    Find the file named wp-config.php in the public HTML folder of your site. Always create a backup copy of this file before editing it, just in case a typo occurs.

    Step 3: Insert the line of code

    Open the file in a text editor. Look for the line that says: /* That's all, stop editing! Happy publishing. */

    Just above that line, paste the following code:

    define( 'MEDIA_TRASH', true );
    

    Note: Setting this to ‘false‘ will disable the trash bin (the default state). To activate the bin, you must set the value to true.

    Step 4: Save and Test

    Save the file (and re-upload it to your server if you edited it locally).

    Now, go to your WordPress Dashboard:

    1. Navigate to Media > Library.
    2. Hover over an image. You should now see “Trash” instead of “Delete Permanently.”
    3. Once trashed, a new “Trash” filter will appear at the top of your media list, allowing you to restore the file or empty the bin.

    Important Considerations

    1. The 30-Day Rule

    Once enabled, media items will stay in the trash for 30 days by default before WordPress automatically deletes them forever. If you want to change this duration (for example, to 14 days), you can add another line to your config file:

    PHP

    define( 'EMPTY_TRASH_DAYS', 14 );
    

    2. Database & Storage Space

    Remember that items in the Trash still take up space on your web server and entries in your database. If you are cleaning up a site to save disk space, remember to “Empty Trash” to actually free up that room.

    3. “Delete Permanently”

    Even with the Trash enabled, you can still skip the bin by clicking the “Delete Permanently” option within the Trash folder itself.

  • MMM Simple File List WordPress plugin – fixed vulnerability

    MMM Simple File List WordPress plugin – fixed vulnerability

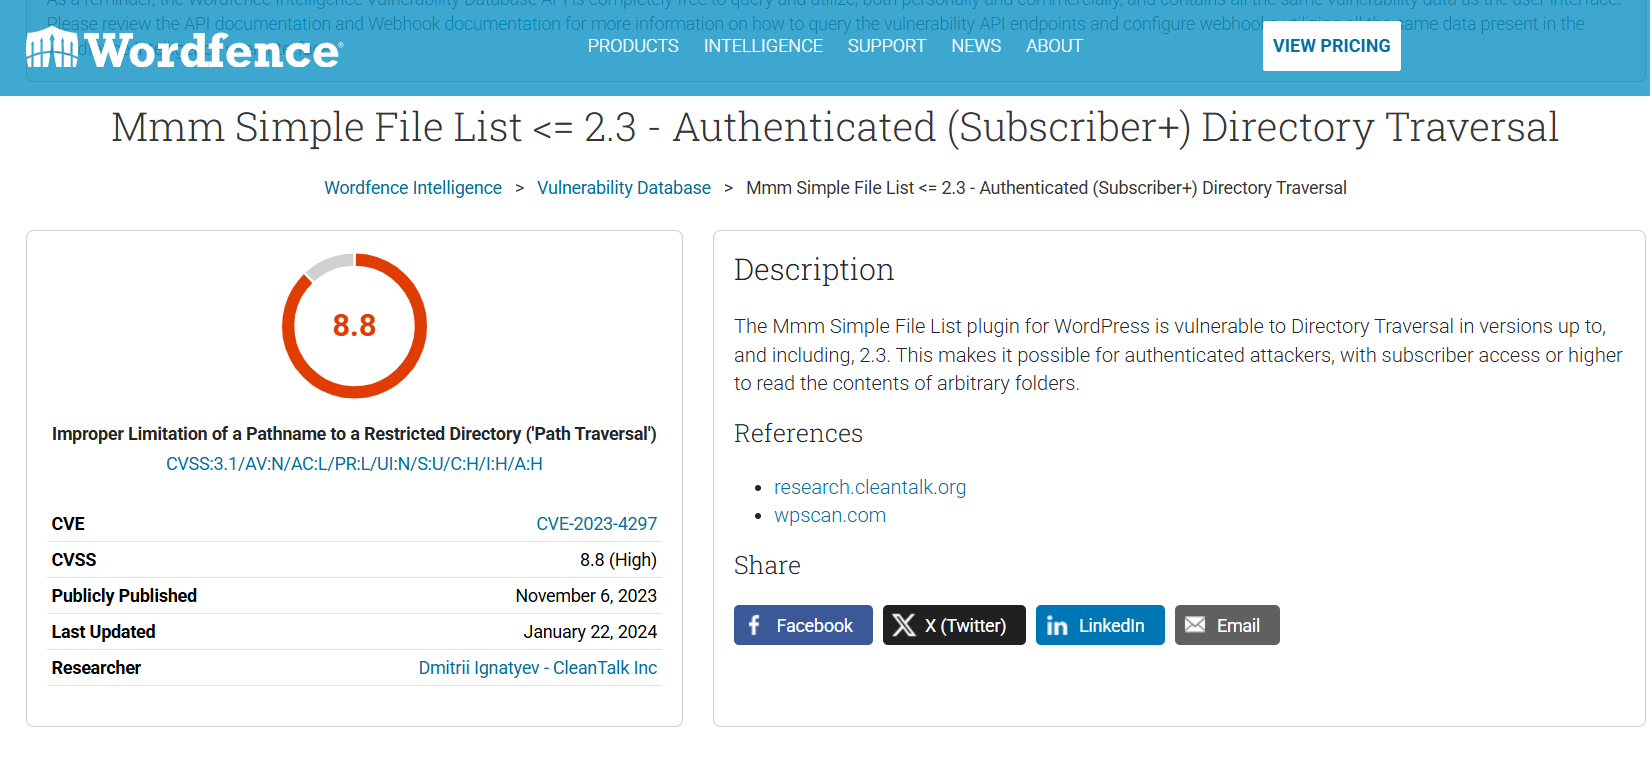
    I found the MMM Simple File List WordPress plugin really useful so it was a shame when a vulnerability was discovered and the plugin was abandoned. This meant it was also removed from the WordPress Plugin Repository and flagged by software like WordFence. So I decided to fix it.

    The Vulnerability & The Fix

    The original code was vulnerable to Directory Traversal. It simply concatenated the user-supplied folder parameter to the base path without validating the result. This allowed an attacker to use ../ sequences (e.g., folder="../../../etc") to step out of the upload directory and list files from sensitive system locations.

    The Patch: I have added a realpath() validation check in the ListFiles function.

    1. Resolve Paths: It calculates the “Real Path” of both the target directory ($dir) and the allowed root ($allowed_root). This resolves any ../ or symlinks.
    2. Verify Containment: It checks if the resolved target directory actually starts with the resolved allowed root.
    3. Fail Safe: If the path attempts to traverse outside the allowed root, the $dir variable is invalidated, causing the plugin to simply report “Folder not found” rather than leaking data.

    You can download the patched plugin here (TBC)

    Plugin info

    A simple plugin to list files in a given directory using this shortcode: [MMFileList /]

    Parameters:

    • folder: Relative to the base uploads directory of your wordpress install (e.g. siteurl.com/wp-content/uploads/mm/yy/ or siteurl.com/wp-content/ or siteurl.com/media). You can check your media settings from your WordPress dashboard in Settings -> Media. If you organize your uploads in the WordPress default month / year base folder you should either prepend this field with “/../../” or disable that setting before uploading files.
    • format: Tabular (format=”table”) or Unordered list (format=”li”) or comma-delimited (format=”comma”) or Unordered List of Images (format=”img” Note: this will put all files in tags) or Custom (format=”custom”) for using the Shortcode content to create a custom template (see Custom Formats section below for more information)
    • types: Only list given file types (e.g. types=”pdf,doc,txt”), If no types are specified then all files in the directory will be listed.
    • class: Only used for the “li”, “img” and “table” formats, applies a given class to the shortcode output (e.g. <ul class=”mmm-list”> / for more information on styling check out the FAQ)
    • limit: The default value will list all files in the directory. You can add a positive number of your choice and that amount of files will be displayed.
    • orderby: Current params can be either “name” (default) or “date” which sorts the files by date modified since date created seems to be hit and miss.
    • order: By default the order of the list is sorted descending (desc) from the highest value to lowest where value is determined by the “orderby” attribute. Ordering by date results in a list being displayed as newest to oldest and ordering by name results in a list descending through the alphabet (a-z). To reverse either of these defaults simply add order=”desc” into the shortcode parameters
    • target: This parameter lets you set a “target” for the links to the listed files (This is typically used to open the files in a new window)
    • prettyname: This replaces underscores and dashes with spaces and removes the file extension from the filename.
    • removesize: This removes the filesize from the default output
    • removeextension: This removes the file extension (leaving underscores and dashes)
    • regexstrip: Feeling like a wizard? Why not put in your own regex to strip out whatever you want from the filenames (no warranty provided, use proper formatting e.g. regexstrip=”/e/” will replace all e’s in the filename!)
    • regexreplace: Want to replace that content with something other than a blank space? Add whatever you want here to work with the regexstrip function
    • regexfilter: Filter out filenames that match a given regex pattern (See usage examples for more info)
    • regexfilterinclusive: Instead of picking out a few files to exclude you can use this to parameter to include anything that you want (See usage examples for more info)
    • dateformat: Adjust the format of the {date} variable in custom templates
    • headings: Adjust the headings of the table format by entering a comma delimited list
    • usecwd: If you can’t get the wp_upload_dir() folder to work you can try setting this to true to use your current working directory instead which should be your public_html folder

    Output:

    For all html formats you can expect to see the following output wrapped in styleable containers:

    • Filename (linked to the File Url)
    • File Size

    At this point “comma” is the only available text output and it only outputs the url to the file in a comma delimited list (no links – just text).

    If the folder you’ve entered isn’t found or there are no files with the extensions you’ve listed there will be some warning text output to let you know. This text is wrapped in a “mmm-warning” class in case you want to style it out (for more information on styling check out the FAQ)

    Usage Examples:

    Let’s say you’re using the default WordPress Media settings so we can expect your uploads folder to be in /wp-content/uploads/mm/yy/ with this in mind the shortcode “folder” attribute will look in a directory relative to this. With this base directory say we want to list “png” files in the folder “/wp-content/uploads/cats/” we would use the following shortcode:

    [MMFileList folder=”/../../cats/” format=”table” types=”png” /]

    If you have you disabled the setting to store uploads in the /mm/yy/ folder structure (you can do this within Settings -> Media) and wanted to display that same file you would use this shortcode:

    [MMFileList folder=”/cats/” format=”table” types=”png” /]

    This will result in a tabular list of all .png files in the /wp-content/uploads/cats/ folder.

    Custom Formats

    The “li” and “custom” formats allow you to define a template using the content portion of the shortcode. The difference between these two output formats is that “li” will still wrap all the output in a <ul> tag and each file will be wrapped in a <li> tag. Here is an example of how to create a custom template:

    [MMFileList folder=”/cats/” format=”li”]<div class=”taco”><a href=”{url}”>{name} ({size})</a></div>[/MMFileList]

    Variables that can be used with the custom templates are as follows:

    • {name} – This will output the filename
    • {size} – This will output the filesize
    • {url} – This will output the file url
    • {date} – This will ouput the file’s last modified date (use the format parameter to customize how this looks!)
    • If you would like more information available to be output don’t hesitate to a send in a request via the support forum

    Regex and List Filtering

    Regex or Regular Expressions are a really powerful tool but can seem intimidating at first. If you’re uncomfortable or having trouble feel free to reach out on the forums. For testing / trying to build your own pattens I recommend using https://regex101.com/ – it’s my goto. As a general rule for this plugin the pattern needs to be written with slashes /likethis/ for it to work. With regex the general rule is to try to keep things simple.

    Using the regexfilter parameter you can exclude or include only specified files.

    Let’s say you have a list of cat pics you want to share but you have both dog and cat photos in the same folder. Luckily for you – they’re still labeled name-cat.jpg or name-dog.jpg. You can use the regexfilter feature to help with your predicament.

    The following will EXCLUDE all files with the word doc in them.
    [MMFileList folder=”/myanimalpics/” regexfilter=”/dog/” /]

    Another feature is the regexfilterinclusive option. Say for some reason your cousin Larry added a bunch of dog and frog photos to the folder but didn’t follow your naming conventions (dangit Larry!) well – have no fear. As long as you have a patten that matches your cat photos you can use this regexfilterinclusive toggle to show only those files.
    [MMFileList folder=”/myanimalpics/” regexfilter=”/cat/” regexfilterinclusive=”1″ /]

    Note: that regexfilter is done before regexstrip and another filename changes (e.g. pretty name, file size/file name removal etc…) so if you’re having trouble this might be part of the issue. Base your pattern on the original filename and you should be good.

    Using regexstrip allows you to remove text that matches a given pattern and regexreplace allows you to put in other text instead of just blank space. These are fairly advanced so I wouldn’t recommend using them unless you really know what you’re doing.

    == Installation ==

    1. Download and install the plugin from WordPress dashboard. You can also upload the entire “MmmFileList” folder to the /wp-content/plugins/ directory
    2. Activate the plugin through the ‘Plugins’ menu in WordPress

    == Frequently Asked Questions ==

    = Why should I use this plugin? =

    Say you have a folder on your webserver with 30 files you want to list but you don’t want to tediously write out the html, load them as media to your WordPress site or edit your htaccess to allow directory listing. This would be the ideal case to have a quick and dirty solution that handles updates to files without additional work on your part.

    = Are there other output formats available? =

    Not at this time. If you want to request them via the forums here then I can have them added fairly quickly.

    = Why not have a settings page or upload functionality? =

    The idea behind this plugin is to be really simple and not mess with your site. The plugin file itself is designed so that you could just copy / paste it into your functions.php and it would run without even needing to worry about a plugin. If you are looking for a full featured file manager you should take a look at File Away.

    = How can I style the list with the class I’ve added? =

    If you have admin access to your site or your theme allows you to add custom styles you can add CSS for the classes you’ve added into there.

    Example:

    If you want to remove the warning text that is output when folders / files are not found you can add the style:

    .mmm-warning {display: none;}

    = The “img” format keeps trying to display non-images, what gives? =

    The “img” format outputs all files in blocks so if you have non-image files in the same directory I recommend using the “types” parameter to specify only images should be displayed then include a second shortcode to include all the non-image types you want to display.

    == Screenshots ==

    1. Sample of the “li” output used with a fairly large set of bylaws.

    == Changelog ==

    = 2.5 =

    Patched vulnerabilities

    = 2.4 =

    Patched vulnerabilities

    = 2.3 =

    • Tested up to 5.9.1 and it still all works
    • Added filename filtering
    • Added inclusive toggle to filtering
    • Updated the readme

    = 2.2 =

    • Added documentation on prettyname, regexstrip, headings, dateformat
    • Added removeextension, removesize, regexreplace, usecwd functions
    • Fixed DESC instead of ASC in the documentation of how ORDER works (Thanks John)
    • Implemented wp_upload_dir and getcwd instead of manually entered file dirs

    = 2.1 =

    • Updated constructor so it is no longer deprecated

    = 2.0 =

    • Refreshed to let WP.org know this plugin still works!

    = 1.9 =

    • Added headings parameter which allows us to customize the headings row on a table with a given bulleted list
    • Added hooks for custom table value templates based on the shortcode content, users can now add a series of tags which will be wrapped in a while building the table

    = 1.8 =

    • Added date modified as an available template parameter using the {date} markup
    • Added file extension as an available template parameter using the {ext} markup
    • Added a “prettyname” parameter to the shortcode which strips dashes, underscores and the file extension when set to “true”, replaces them with spaces, adds spaces between uppercase characters and then trims everything nicely
    • Added a “regexstrip” parameter to the shortcode which strips away characters based on a given regex string from the user (Note: will throw errors if the regex isn’t properly formatted!)
    • Added a “dateformat” parameter for adjusting how the date modified variable appears
    • Added an output format called “li2” which renders the name date and extension parameters in an unordered list

    = 1.7 =

    • Changed default order setting to be labeled as “ascending|asc” instead of “descending|desc”

    = 1.6 =

    • Added “order” parameter

    = 1.5 =

    • Bug fix for orderby date code

    = 1.4 =

    • Bug fix for tabular list target and class vars not being passed through correctly.

    = 1.3 =

    • Updated human_filesize function to work according to the standardized International System.

    = 1.2 =

    • Fixed bug with array_map usage in 5.2.17

    = 1.1 =

    • Fixed missing break; in the format switch

    = 1.0 =

    • Added hooks for shortcode content to customize output of some templates
    • Added a “custom” output format for use with the content hook
    • Organized the code and updated some comments to reflect the hook change
    • Added some “borrowed” code to fix the empty tag issue common with WordPress shortcodes

    = 0.7 =

    • Added “img” output format to create an Unordered List of Images.
    • Changed code so all files in the directory will output if no types are listed (this may annoy some people but it makes the experience much friendlier for new people).

    = 0.6a =

    • Added slightly more robust path code so trailing / preceeding slashes aren’t so tricky to work with. e.g. say you want to load files from a folder called “cats”. You can now simply have folder=”cats” instead of having to include the first slash “/cats” and having to avoid using the trailing slash “/cats/”. Any variation should work along with handling of cases when too many slashes are added “//cats//”.

    = 0.6 =

    • Reworked how the class parameter is passed through the code so more information can be sent along with it
    • Added the option to include target for the links using the aforementioned method

    = 0.5 =

    • Added limit and orderby params to the shortcode
    • Changed the code to check if the directory exists before trying to get the files (this fixes the issue with warning messages from being displayed while having debug mode enabled)

    = 0.4 =

    • Added some output to show if the folder was not found or if there were no files of the given extension(s) found in the directory
    • Note: These new messages are wrapped in divs with a “mmm-warning” class so they can be styled to be hidden.

    = 0.3 =

    • Added “table” output format
    • Added “filesize” to information that is output (this should automatically format to the nearest reasonable size B,K,M,G etc..)
    • Adjusted how the file array is built so it’s more extensible
    • General Code Cleanup (naming changes, readibility prioritized over condensed & dehydrated code)

    = 0.2 =

    • Fixed a bug related to folders within the given path
    • Updated support docs and plugin description to show that folder is the base uploads directory and not the base directory.

    = 0.1 =

    • Initial release to WordPress.org

    == Upgrade Notice ==

    = 0.5 =
    New shortcode params and some code fixes for users running in debug mode.

    = 0.4 =
    Debug text added in case you’re not seeing files when you expect them to appear.

    = 0.3 =
    Adds functionality and some code cleanup.

    = 0.2 =
    If you’re having trouble with folders in your chosen directory then you should upgrade to fix that bug.


  • Carl Jung’s 5 rules for a a meaningful, well‑lived life

    Carl Jung’s 5 rules for a a meaningful, well‑lived life

    Strictly speaking, Carl Jung didn’t publish an official list of “5 rules.” But we can distil five core Jungian principles that many people use as a practical guide to a meaningful, well‑lived life. Here they are, each with the core idea, why it matters, and how to practice it day to day

    1) Know—and integrate—your Shadow

    Core idea:
    We all carry a “shadow”—the parts of ourselves we deny, repress, or dislike (impulses, fears, envy, ambition, vulnerability). Jung’s point wasn’t to eradicate the shadow, but to make it conscious and integrate it.

    Why it matters:
    Unacknowledged traits get projected onto others (we “see” in them what we can’t accept in ourselves), which distorts relationships and choices. Integration brings honesty, emotional range, and real self‑command.

    How to practice:

    • Notice strong reactions: what irritates or fascinates you in others often points to shadow material.
    • Try “shadow journaling”: “What am I unwilling to admit I want/feel/need right now?”
    • Use “active imagination”: have a written dialogue with a disowned trait (e.g., “my inner critic” or “my envy”), asking what it wants and how it could serve you if channelled constructively.

    2) Individuate: Become who you are

    Core idea:
    Individuation is Jung’s term for the lifelong process of becoming your most authentic, whole self—differentiated from family scripts, social expectations, and borrowed identities.

    Why it matters:
    Without individuation, success can feel empty and relationships feel role‑bound. With it, you gain inner authority, meaning, and resilience.

    How to practice:

    • Write your values in verbs (“Create honestly,” “Serve beauty,” “Tell the truth clearly”) and check weekly decisions against them.
    • Track dreams or recurring images; they often signal unlived potentials or course corrections.
    • Run small experiments that express a hunch about who you’re becoming (e.g., a new creative direction, boundary, or routine) and review what you learn.

    3) Balance Persona and Authenticity

    Core idea:
    Your Persona is the social mask that helps you function in roles (leader, parent, professional). It’s useful—but it isn’t the whole of you. Jung warns against confusing the mask with the Self.

    Why it matters:
    Over‑identifying with the Persona leads to burnout, emptiness, or brittle defensiveness. A flexible Persona lets you be effective and real.

    How to practice:

    • Do a quick roles audit: In each role, what do I perform that’s true? What’s performative? Where can I bring 5% more honesty?
    • Set “authenticity anchors”: one practice per role (e.g., share one uncertainty in team meetings; protect one creative hour daily).
    • Notice when compliments or criticism feel like life‑or‑death—often a sign you’re fused with the mask.

    4) Listen to the Unconscious: Symbols, Dreams, Synchronicity

    Core idea:
    The psyche speaks in images and symbols. Paying attention to dreams, slips, creative impulses, and meaningful coincidences (synchronicities) gives you guidance your rational mind may miss.

    Why it matters:
    You tap into deeper intelligence, often gaining timely direction on relationships, work, and health.

    How to practice:

    • Keep a dream journal by your bed; title each dream with a strong verb (“Chased by waves”). Ask: What feeling is central? Where is this in my day life?
    • Make space for symbolic play—drawing, music, walking without podcasts—so images can surface.
    • Note coincidences that cluster around a question you’re holding. Stay grounded: use them as prompts for reflection, not absolute orders.

    5) Seek Wholeness, not Perfection—Find Meaning in Suffering

    Core idea:
    Jung emphasizes wholeness (embracing opposites—strength and softness, reason and feeling) over perfection. Life includes conflict and suffering; the task is to find meaning and integrate what happens into your story.

    Why it matters:
    Perfectionism fragments you and stalls growth. Meaning transforms hardship into depth and wisdom.

    How to practice:

    • Reframe challenges as tasks of the soul: What part of me is being asked to grow here?
    • Create small rituals around stuck places (a weekly reflection walk; a letter you don’t send; a candle you light before difficult work).
    • Offer what you’ve learned in service to others—sharing your process completes the meaning loop.

    Quick Summary

    1. Shadow: Own your disowned traits to reduce projection and increase integrity.
    2. Individuation: Live your values and become more you over time.
    3. Persona: Use your social mask, but don’t let it use you.
    4. Unconscious: Attend to symbols and dreams for deeper guidance.
    5. Wholeness > Perfection: Turn suffering into meaning; integrate opposites.
  • Golden Circle Messaging

    Golden Circle Messaging

    The Golden Circle is Simon Sinek’s simple framework for communicating and leading with purpose. It has three layers:

    • Why – your cause or belief: the reason you exist beyond making money.
    • How – the distinctive ways you deliver on that belief.
    • What – the products or services you offer.

    Most organizations talk outside‑in (“what we do” → “how we do it” → a vague “why”). The most compelling brands and leaders go inside‑out: they start with Why, then show How, and finally What. This order inspires trust and creates meaning—because people don’t just buy features, they buy the reason behind them.

    Why it’s useful

    • Clarity & focus: Anchors your strategy and messaging to a purpose, not just activities.
    • Differentiation: Moves you beyond commodity features to a belief customers can align with.
    • Emotional connection: Builds affinity and loyalty that outlast price and specs.
    • Consistent storytelling: Makes every message—website, sales, hiring—feel coherent.
    • Better decisions: Helps teams prioritize work that advances the purpose.

    As Sinek puts it, “People don’t buy what you do; they buy why you do it.” When you lead with Why, you invite customers and employees to join a mission—not just make a transaction.

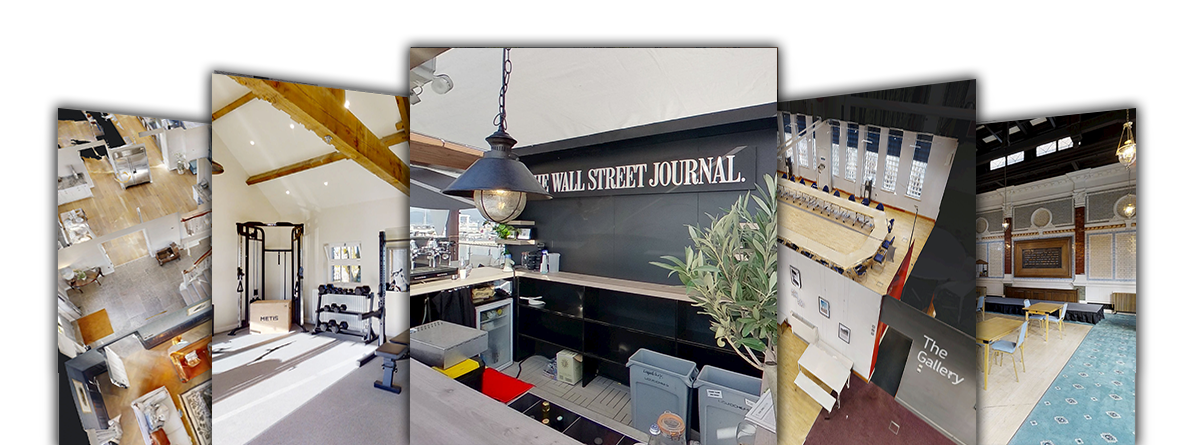
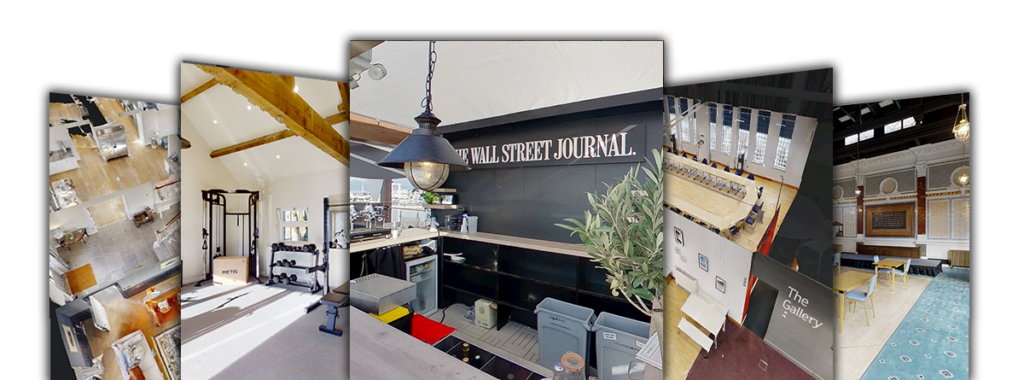
    The following example is the ‘Golden Circle’ framework applied to GoCasa.me, a company producing virtual tours and other visual assets for hotels and holiday lets throughout the UK and France.

    GoCasa.me — Golden Circle Messaging

    Start with WHY – the core belief

    “We believe venues should be chosen for how they feel, not just how they look.“

    By removing uncertainty from online decision‑making, we help guests and bookers feel confident before they ever arrive—so great spaces get the bookings they deserve.

    Next we move to ‘HOW’ – GoCasa.me’s unique way of delivering the Why

    • Immersive, interactive 360° virtual tours that let people explore as if they’re there.
    • Clear storytelling for decision‑makers: journeys designed for planners and guests (not just browsers).
    • Booking‑ready integration: embedded CTAs, inquiry forms, and links to your PMS/booking flow.
    • Optimised for SEO & speed: fast load, mobile-first, accessible, and easy to embed across web and socials.
    • End‑to‑end service: planning, capture, editing, hosting, analytics, and ongoing updates.
    • Multi‑property rollout for hotel groups and agencies—consistent brand presentation across portfolios.

    Finally the ‘WHAT’ – the tangible offering


    Here are some examples of the ‘Golden Circle’ messaging applied to pitches, speculative email, and website text

    15‑second Elevator Pitch – “GoCasa creates immersive virtual tours that make great spaces bookable from anywhere. We help hotels, venues, and premium holiday lets turn interest into confident bookings—by showing the true experience online, not just static photos.”

    30–45‑second Elevator Pitch – “Choosing a venue or property still involves guesswork. GoCasa removes that friction with interactive 360° tours designed for decision‑makers. We plan the story, capture your space, and integrate booking CTAs so visitors don’t just browse—they enquire and book. From single sites to multi‑property portfolios, we deliver a fast, accessible experience that fits your brand and increases conversion.“

    Website Hero (Headline + Subhead + CTAs)

    Headline: Show the experience. Win the booking.
    Subhead: Immersive, decision‑ready virtual tours for hotels, event spaces, and premium holiday lets—crafted to turn browsers into bookers.
    CTAs: ‘Book a short demo‘ or ‘See live examples‘

    LinkedIn “About” (Short)

    GoCasa builds immersive virtual tours that make exceptional spaces easy to choose and book. We specialise in hotels, event venues, and premium holiday lets across the UK and France—delivering decision‑ready tours with clear calls to action, fast loads, and brand‑consistent rollout for portfolios.

    Cold Email Opener (to Hotel/Events Marketing Managers)

    Subject options:

    • “Turn virtual show‑arounds into bookings (not just views)”
    • “Virtual tours that planners actually use”
    • “Reduce site visits, increase confidence—without more ad spend”

    Opening lines:

    Hi {{First Name}},
    When planners and guests can feel your space online, they choose faster. GoCasa creates immersive tours built for decision‑making—clear flows, CTAs, and fast load—so your web traffic turns into qualified enquiries. If a 10‑minute demo with examples from {{their segment}} is useful, I’d be glad to share.

    Short Voicemail / Phone Opener

    “Hi {{Name}}, it’s Chris from GoCasa. We create immersive virtual tours for hotels and event venues that reduce site visits and increase booking confidence. If you’re reviewing web conversion or sales enablement this quarter, a quick 10‑minute walkthrough could be helpful. I’ll email a couple of examples—worth a look?”

    Slide Copy (for your deck)

    • WHY: People choose spaces by how they feel—we bring that feeling online.
    • HOW: Decision‑ready virtual tours with built‑in booking paths, SEO‑optimised, brand‑consistent, fully managed.
    • WHAT: Immersive tours and add‑ons for hotels, event venues, and premium holiday lets across the UK & France.

    Taglines

    • Make your space bookable from anywhere.
    • Show the experience, not just the room.
    • From virtual tour to confirmed booking.
    • Remove the guesswork. Win the booking.
    • Let buyers feel certain.

    Segment‑Specific Angles (swap into emails/landing pages)

    For Hotels & Groups

    • Standardised rollouts, consistent brand presentation across properties.
    • Virtual site visits for corporate planners; reduce low‑intent tours and F&B walk‑throughs.
    • Integrates with booking flows; supports multi‑language labels for international guests.

    For Event Venues

    • Showcase layouts and capacities with floor plan overlays and highlight reels.
    • Replace first‑round site visits; speed up short‑lead bookings.
    • Embed enquiry forms and preferred suppliers within the tour.

    For Premium Holiday Lets

    • Set accurate expectations; reduce pre‑arrival questions and disappointment.
    • Show proximity to features (views, outdoor spaces, spa, workspace).
    • Improve direct bookings and reduce dependence on OTAs.

    Differentiators (non‑technical, value‑first)

    • Decision‑design over “tech for tech’s sake”. We structure tours to answer the questions that actually close bookings.
    • Hands‑off for your team. We plan, capture, edit, host, integrate, and report.
    • Performance mindset. Clear CTAs, fast load, accessible and mobile‑first to support SEO and conversion.
    • Scales across portfolios. Consistent templates and brand standards for multi‑property teams.
    GoCasa creates immersive virtual tours that make great spaces bookable from anywhere. We help hotels, venues, and premium holiday lets turn interest into confident bookings—by showing the true experience online, not just static photos
    GoCasa creates immersive virtual tours that make great spaces bookable from anywhere. We help hotels, venues, and premium holiday lets turn interest into confident bookings—by showing the true experience online, not just static photos
  • New UK drone regulations from 1st January 2026

    New UK drone regulations from 1st January 2026

    From 1 January 2026, several important changes to UK drone regulations will take effect, impacting every operator—from hobbyists to commercial professionals like those at Seven Creative or GoCasa.me. These updates aim to streamline operations, enhance airspace safety, and increase public trust in drone use.

    1. UK Class Marks: Know Your Drone

    A new UK drone classification system (UK0–UK6) becomes mandatory for all new drones placed on the market:

    • UK0: under 250 g, Open category A1 (Over People)
    • UK1: under 900 g, A1 (Over People)
    • UK2: under 4 kg, A2 (Near People) or A3 (Far People)
    • UK3: under 25 kg, A3 (Far People)
    • UK4: under 25 kg, typical model aircraft, A3
    • UK5/UK6: under 25 kg, Specific Category under CAA approval

    EU “C-class” drones (C0–C6) remain valid as UK equivalents until 31 December 2027. Drones without class marks (“legacy drones”) continue under weight-based rules but face tighter regulations for registration and identification.

    2. Flyer ID and Operator ID

    • Flyer ID: Required for anyone flying drones weighing 100 g or more.
    • Operator ID: Needed for drones ≥ 100 g with a camera, or ≥ 250 g regardless of camera.

    This means even compact drones—like those used for aerial imagery in virtual tours—now require formal credentials for legal use.

    3. Remote ID: A Digital “Number Plate”

    • From 1 January 2026, all Class‑marked drones (UK1, UK2, UK3, UK5, UK6) must broadcast Direct Remote ID—sharing operator ID, serial number, and position via Wi‑Fi/Bluetooth.
    • From 1 January 2028, legacy drones, privately built aircraft, and UK0 with a camera (≥ 100 g) must also transmit Remote ID.

    This lets authorities track drone flights in real time, reducing misuse and ensuring safety.

    4. Night Operations: Green Light Required

    Drone or model aircraft flown at night must be fitted with a green flashing light and operated with it switched on during flight. This improves visibility for other pilots and ground observers.

    5. CAA Becomes UAS Market Surveillance Authority

    The CAA will act as the UK’s Market Surveillance Authority, overseeing drone manufacturing and sales. This ensures all drones meet safety standards and allows enforcement actions against non-compliant products.


    What This Means for Seven Creative and Our Clients

    1. Compliance with Class Marks
      • When selecting drones for aerial imaging or 360° tours, ensure they carry the appropriate UK class mark.
      • For operations near people, consider UK2-class drones with an A2 Certificate of Competency.
    2. ID and Registration
      • All pilots using drones over 100 g must hold a Flyer ID and, if applicable, an Operator ID.
      • Registering drones in the UK CAA system and activating Remote ID is now mandatory for compliant operation.
    3. Night-Time Operations
      • Fit and use a green flashing light when capturing night-time exterior visuals—for compliance and improved visibility.
    4. Instrument & Equipment Upgrades
      • Check whether existing drones (especially older models) support Remote ID via firmware or hardware.
      • Plan procurement of UK‑class drones to simplify future operations and reduce regulatory friction.

    Why These Changes Matter

    With drone use expanding—especially in fields like 3D modeling and external building photography—these rules build a safer, more transparent environment:

    • Class-marked drones are easier to assess and manage.
    • Remote ID navigation boosts accountability.
    • Night lighting safeguards low-light operations.
    • Market oversight reduces risks from unsafe products.

    For Seven Creative, staying on top of these changes not only ensures legal compliance but also reinforces your commitment to safety and professionalism—something clients will value.

    This post has used information from the Civil Aviation Authority – click this link for more info

    Drone Operator Compliance Checklist (Effective 1 January 2026)

    Before You Fly:

    • Check Class Mark – Ensure your drone has the correct UK class mark (UK0–UK6).
    • Register & IDs – Obtain a Flyer ID (for drones ≥ 100 g) and Operator ID (for drones ≥ 100 g with a camera or ≥ 250 g).
    • Remote ID Ready – Confirm your drone broadcasts Remote ID if class-marked.
    • Night Flight Equipment – Activate or retro-fit a green flashing light for any night operations.
    • Firmware Updates – Update your drone to enable Remote ID and compliance features.
    • CAA Guidance – Review the latest CAA rules and category requirements.

    Planning Ahead:

    • Legacy Drone Strategy – Prepare for Remote ID requirements for older drones by 2028.
    • Training & Certificates – Complete A2 Certificate of Competency if flying near people.
    • Safety Check – Inspect your drone for hardware integrity and battery health before flight.

    Example 3D model of a building we produced recently using a drone

  • How clean up your email and reduce spam

    How clean up your email and reduce spam

    If your inbox feels like a never-ending avalanche of spam, newsletters you never read, and old conversations you don’t need, you’re not alone. A messy inbox isn’t just annoying—it slows you down, makes it harder to find the stuff that matters, and can even open the door to security risks like phishing scams.

    The good news is that cleaning up your inbox doesn’t have to be a chore. With a few smart steps and some good new habits you can cut the clutter, block the junk, and make email start working for you again instead of against you.

    In this post, we’ll share simple ways to tidy up your inbox, reduce spam, and keep things running smoothly—so you can spend less time deleting and more time doing.

    In the meantime, if you need Microsoft email (Exchange) or Office setting up, get in touch with us

    Step 1 – make sure your email address isn’t public

    This is more of a preventative step to stop future spam but important nevertheless

    1. Do a Google search for your email address in quotations. If you find it, remove it from the public web page (if it’s your website) or make a request to the site owner that it be removed. Also, ask Google to remove the result (use the three dot menu)

    You should also of course check if your email address has been in a data breach. If the answer is yes, you should probably consider changing your password sooner rather than later. Go to the ‘Have I Been Pwned’ website

    Step 1b – if you have to have your email address visible on a website, try using HTML encoding or Javascript Obfuscation

    The code on your site would look something like this making it much harder for data scrapers to grab it (this example is HTML character encoding):

    
    <a href="mailto:&#;&#102;&#111;&#64;&#101;&#120;&#97;&#109;&#112;&#108;&#101;&#46;&#99;&#111;&#109;
    &#105;&#110;&#102;&#111;&#64;&#101;&#120;&#97;&#109;&#112;&#108;&#101;&#46;&#99;&#111;&#109;
    

    Alternatively, can you include your email address as an image?

    Step 2 – clean your inbox

    1. Go through your spam folder and mark anything that you find in there that shouldn’t be there as ‘trusted’ or ‘not spam’
    2. Then go through your inbox carefully. Anything that is spam, mark as spam and move to your spam folder
    3. Go back to your spam folder and search for the word ‘unsubscribe’. Open each unsubscribe link in turn and unsubscribe from the mailing lists
    4. Do this every day, or a bit of it every day, or at least as often as you can

    Over time you’ll reduce the amount of spam you receive and your spam will be less likely to end up in your inbox

    Can’t be bothered with the steps above? Just dump your old email address

    Might sound drastic but it’s quite liberating and stops spam instantly

    1. Setup a brand-new email address for yourself
    2. Setup an auto-responder on the previous email account, something like ‘This email address is no longer used or monitored. Instead use the following <new email address> to get in touch with me’. Spammers don’t send emails personally so they’re unlikely to get your new email address from the auto-responder
    3. Go through your old website accounts and update them with your new email address
    4. Email your important contacts to tell them you’ve changed your address

    Hey presto – no more spam

    Need help setting up a new email account? Get in touch

    If you’re tired of battling spam and juggling multiple inboxes, Microsoft 365 is a game-changer. It’s not just email—it’s a complete productivity suite designed to keep your business running smoothly. With Outlook, you get powerful spam filtering, smart rules to organize messages, and built-in security features that help protect against phishing and malware. No more wasting time digging through junk mail or worrying about suspicious links.

    But that’s just the start. Microsoft 365 brings everything together—Word, Excel, Teams, OneDrive—so your emails, files, and conversations all work seamlessly. Need to share a document straight from your inbox? Done. Want to schedule a meeting without leaving your email? Easy. It’s all about saving time and reducing stress.

    Whether you’re a small business or a growing team, Microsoft 365 gives you the tools to stay organized, secure, and connected—without the headaches. If you’re ready to take control of your inbox and boost productivity, we can help you get set up quickly and easily.

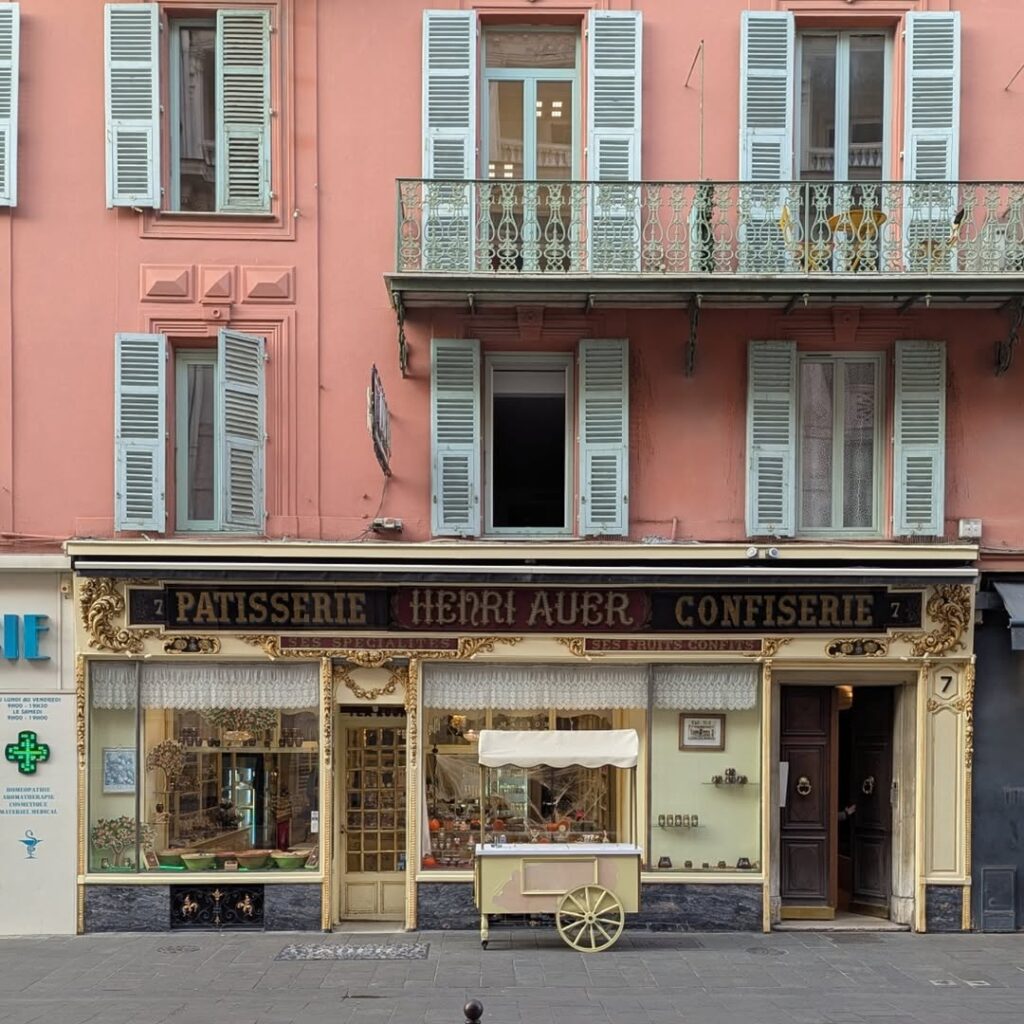
  • Location Scouting in France: Why the French Riviera Is a Creative Goldmine (and How to Be Found Online)

    Location Scouting in France: Why the French Riviera Is a Creative Goldmine (and How to Be Found Online)

    Location scouting sits at the intersection of logistics and storytelling. The right place doesn’t just look good; it adds emotional texture, cultural context, and visual continuity. France—especially the French Riviera—offers an unusually dense mix of cinematic, photogenic, and practical locations for film, advertising, hospitality marketing, and high-end editorial shoots.

    This guide gives you a scout’s-eye view of France’s most compelling backdrops, surprising Riviera finds, and a tactical plan for optimising your website so you attract brands and agencies actively searching for location scouting partners. We’ll also highlight GoCasa’s location scouting support services—a trusted partner for on-the-ground expertise across France.


    Why France Is a Location Scout’s Dream

    France packs extraordinary diversity into drivable distances. You can move from Belle Époque promenades to medieval hill towns in an afternoon; trade lavender fields for alpine passes; or pivot from industrial-chic warehouses to glittering marinas without losing a shooting day.

    • Architectural Range: Parisian Haussmannian grandeur, Riviera Belle Époque hotels, Roman ruins, fortified citadels, and mid-century modern villas.
    • Natural Variety: Calanques, terraced vineyards, pine forests, river gorges, and snow-capped backdrops from late autumn through spring.
    • Infrastructure & Access: Excellent road and rail links, reliable power, and plentiful accommodation options—even in shoulder seasons.

    Surprising reality: winter on the Riviera is both sunny and quiet, delivering softer light, less crowd control, and easier logistics—ideal for moody campaigns, luxury editorials, and narrative shoots that need atmospheric streets without the peak-season bustle.


    The French Riviera: Beyond Beaches and Billionaires

    The Côte d’Azur’s reputation for yachts and champagne is well-earned—but the real payoff for scouts lies in the contrast just minutes inland.

    Hidden Hilltop Villages

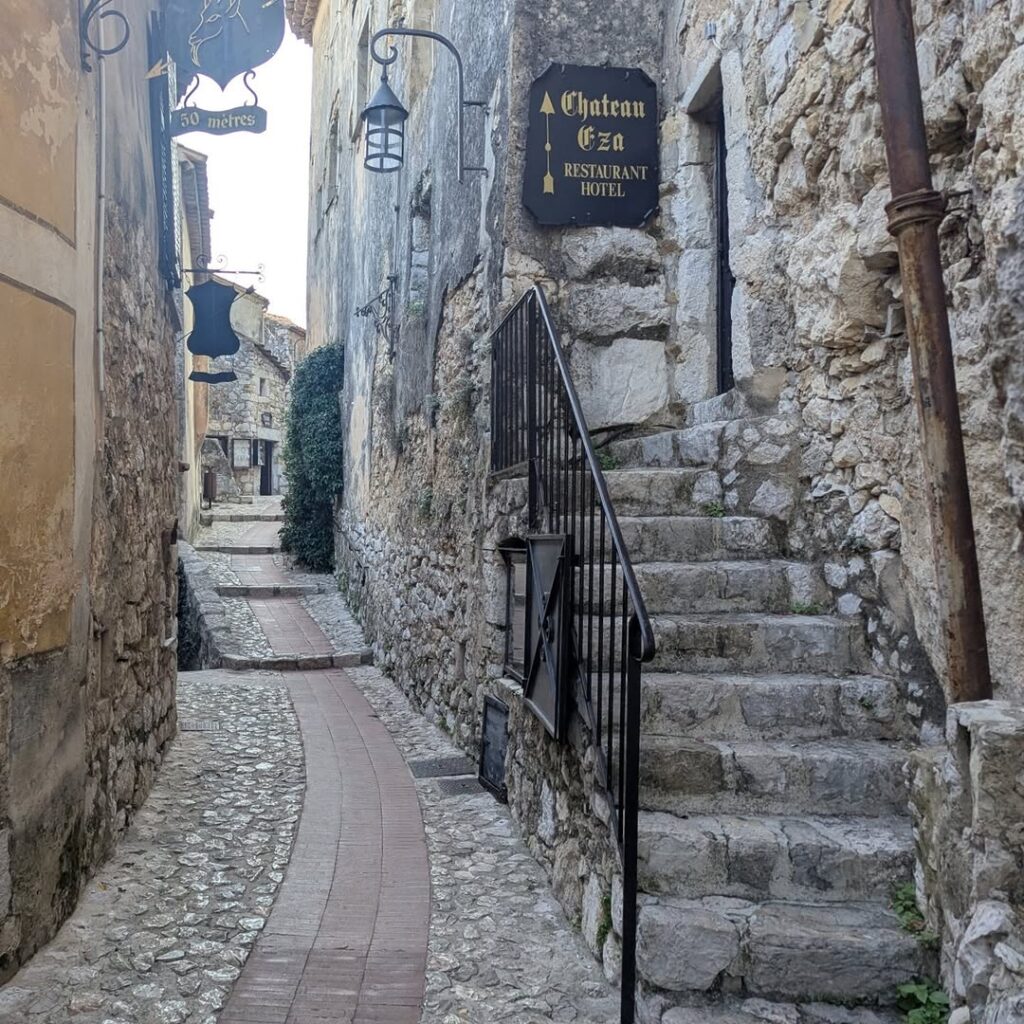
    • Èze, Gourdon, Sainte-Agnès: Stone lanes, cliffside terraces, and panoramic views that read “timeless European” at any focal length.
    • Grasse & Surrounds: Perfume heritage, flower farms, and rustic estates—perfect for lifestyle, heritage brands, and experiential tourism content.

    Coastal Micro-Styles

    • Villefranche-sur-Mer: Pastel facades framing one of the Mediterranean’s deepest natural harbours—great for fashion and travel narratives.
    • Antibes & Juan-les-Pins: Fortified ramparts, pine groves, sandy bays, and Picasso connections for cultural credibility.
    • Menton: Lemon groves, Italianate colour palettes, and low-season serenity—ideal for brand shoots needing privacy and warmth.

    Riviera in the Off-Season

    • Light & Texture: Winter sun gives a diffused, painterly quality at golden hour, with little haze.
    • Permits & Access: Reduced demand makes it easier to secure prime spots and minimise time lost to crowd control.
    • Costs: Accommodation and support services can be more negotiable, freeing budget for talent, equipment, or additional locations.

    Practicalities: Permits, Permissions, and Local Know‑How

    France is welcoming to productions, but the Riviera’s popularity means you’ll want experienced local partners who understand municipal permits, private estate negotiations, and resident relations.

    • Municipalities: Rules vary by town; central squares and seafronts may need advance applications and police coordination.
    • Private Properties: Luxury villas or heritage hotels often require discreet negotiation, proof of insurance, and a clear impact plan.
    • Seasonality: Shoulder months (April–June, September–November) often strike the best balance of light, access, and rates.

    For support, lean on GoCasa’s location scouting support services. They specialise in scouting for photography, film, and virtual tours across France—bridging language, logistics, and local relationships so your production moves smoothly from brief to wrap.


    A Scout’s Shortlist: Shot Types & Where to Find Them

    • Old‑World Luxury: Nice’s Promenade des Anglais; Cannes’ Croisette; Belle Époque hotel facades in Menton.
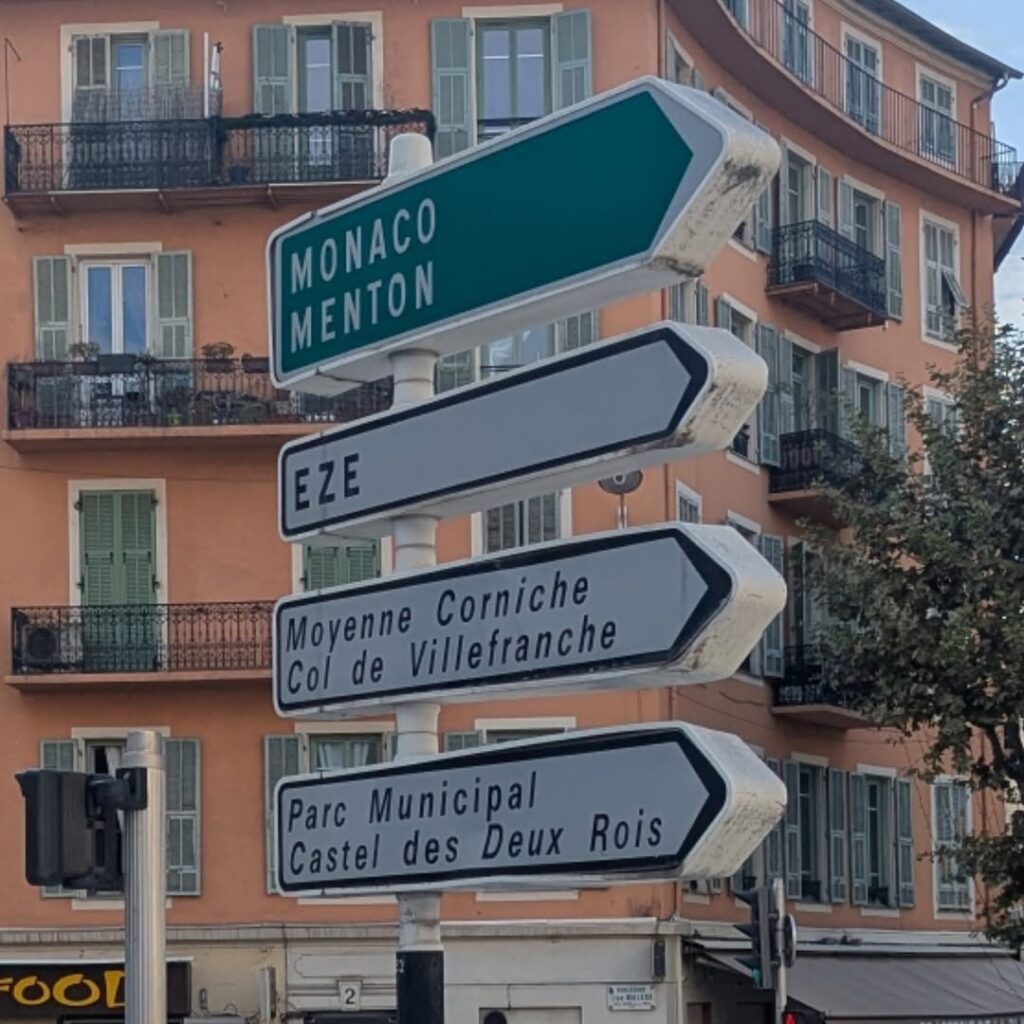
    • Cliffside Drama: The Corniche roads and coastal viewpoints between Nice and Monaco, or above Èze.
    • Industrial Chic: Warehouses and modern art spaces in and around Nice; back-of-house marina infrastructure for sleek, contemporary frames.
    • Natural Blueprints: Calanques near Cassis (a bit west of the classic Riviera), red rock massifs of the Estérel, and vineyard terraces around Var.

    How to Optimise Your Website to Be Found for “Location Scouting” (Seven Creative’s Playbook)

    If you offer locations, scouting services, or venue access, your website should be engineered to capture high‑intent searches like “location scouting French Riviera,” “film locations France,” or “photo shoot locations Nice.” Seven Creative’s approach focuses on being discoverable to brands, agencies, and production managers at the exact moment they search.

    1) Build Dedicated, Intent‑Driven Pages

    Create standalone pages for each core service and geography:

    • /location‑scouting/ (pillar page targeting “location scouting”)
    • /location‑scouting/france/
    • /location‑scouting/french‑riviera/
    • /location‑scouting/nice/, /cannes/, /antibes/, /menton/

    Each page should include:

    • Primary keyword: “location scouting” (headline, intro paragraph, subhead, and meta title).
    • Secondary keywords: “French Riviera locations,” “film permits,” “photo shoot venues,” “scouting support services,” “hidden Riviera villages.”
    • Local cues: Town names, districts, landmarks (e.g., Promenade des Anglais, Èze, Villefranche-sur-Mer).
    • Proof points: Example shoots, testimonials, turnaround times, permit knowledge.

    Internal link suggestion: From this blog, link to /services/location-scouting/ and /portfolio/ on Seven Creative (create these pages if they don’t yet exist).

    2) Showcase Scannable Visual Evidence

    • Location Index: A filterable gallery by style (coastal, hilltop, heritage, modern), permit type (public/private), and season.
    • Case Studies: Before/after moodboards, lighting notes (“winter AM vs summer PM”), and logistics breakdowns.
    • Structured Data: Use schema (e.g., LocalBusiness, Service, FAQPage) to help search engines surface your expertise.

    3) Capture the Right Queries with Content Blocks

    On each page, include sections that directly mirror common search intents:

    • “How to get film permits in [Town]”
    • “Best photo shoot locations near [Town]”
    • “Riviera off-season scouting: pros & cons”
    • “Private villa filming: insurance & privacy checklist”

    End each section with a clear CTA: “Request scouting shortlist within 48 hours.”

    4) Speed, UX, and Trust Signals

    • Fast media: Optimise images (WebP), lazy load galleries, compress video teasers.
    • Clear navigation: A “Locations” menu item with sub‑regions; filters visible on mobile.
    • Trust: Insurance badges, client logos, testimonials, and transparent pricing ranges.

    5) Smart Internal/External Linking

    • Internally: Link between related area pages (e.g., French Riviera ↔ Nice ↔ Cannes).
    • Externally: Reference GoCasa’s location scouting support services for broader coverage or specialist help.
    • Blog topics to interlink:
      • “How to Plan a Riviera Shoot in 10 Days”
      • “Winter Scouting on the Côte d’Azur: Lighting and Logistics”
      • “Permit Fast‑Track: Working with Municipalities in Nice & Cannes”

    6) Conversion Hooks That Match Scout Reality

    • Downloadable shortlists: “Top 25 Riviera locations for fashion campaigns (PDF).”
    • Inquiry form with specifics: date window, crew size, visual style, permit needs, privacy requirements.
    • Response SLA: Prominently state “Initial shortlist within 48 hours.”

    Example On‑Page Copy Snippets You Can Reuse

    H1: Location Scouting on the French Riviera
    Intro paragraph:
    We provide fast, practical location scouting across the French Riviera, from hilltop villages to coastal promenades. Expect tailored shortlists, permit guidance, and on‑the‑ground support—delivered quickly and discreetly.

    Service highlights (bulleted):

    • Scout shortlist within 48 hours
    • Permit pathways for public and private spaces
    • Off‑season access plans for quiet shoots
    • Trusted partners for estates, heritage venues, and hotels

    CTA:
    Request your Riviera scouting shortlist today → [Contact Seven Creative]


    Working with GoCasa: Extend Your Reach Across France

    If your project spans multiple regions—or you need deep local relationships—GoCasa’s location scouting support services can help source unique spaces, manage permissions, and coordinate scout logistics across France. Their experience with hospitality venues, event spaces, and luxury holiday lets complements Seven Creative’s content strategy and web optimisation, giving productions both places and a path to find them.


    Final Tips for a Smooth French Scout

    • Seasonal Strategy: Book popular coastal spots early for spring/summer; prioritise hill towns and off-season mornings for quiet streets and crisp light.
    • Insurance & Paperwork: Prepare certificates upfront for private estates and heritage sites.
    • Local Crew: Consider bilingual fixers; they expedite permits and reduce miscommunications.
    • Plan B & C: Weather can shift quickly—have interior alternates (galleries, atriums, covered markets).

    In summary – Be Discoverable, Be Dependable

    France—and the French Riviera specifically—offers an unmatched mix of atmosphere, architecture, and access for memorable visual storytelling. Pair that with smart, intent‑driven SEO and compelling evidence on your website, and you’ll position Seven Creative to capture the searches that matter: “location scouting” queries from brands, producers, and agencies who need results fast.

    For more information on SEO and website optimisation for Location Scouting websites, get in touch with us here at Seven Creative

  • Step-by-step guide to manually moving a WordPress site to a new server continuing to use the same domain name

    Step-by-step guide to manually moving a WordPress site to a new server continuing to use the same domain name

    Moving a WordPress website can seem daunting, but it is doable with the right steps. This the process that works for me. If your website is important, and you’re at all unsure, please get someone who knows what they’re doing to help. if you want to have a go yourself, here is a comprehensive step-by-step guide:

    Step 1 – prepare

    1. Audit your site. I like to list all the plugins I have, disable the ones that aren’t being used or are not important. I then delete all the unused plugins and themes that can accumulate. Make a note of the PHP version you’re using.
    2. Full backup. This is the most critical step. Before doing ANYTHING, create a complete backup of your existing WordPress site.
      • WordPress Backup Plugins: Plugins like UpdraftPlus, Duplicator, or BackWPup are excellent for this but they can be expensive. They’ll back up your database, files, themes, and plugins.
      • Manual Backup (FTP + phpMyAdmin):
        • Files: Connect to your current host via FTP (FileZilla is a popular client) and download your entire wp-content folder, wp-config.php file, and any other root WordPress files.
        • Database: Backup your database directly from accessing your DB manager – usually phpMyAdmin. Select your WordPress database, click on the “Export” tab, choose “Quick” or “Custom” (for more options), and download the .sql file.
      • Make sure your backups are kept safe!
    3. Update your version of WordPress, your template and your plugins. If this bot goes wrong, you’ve got a back-up
    4. Setup your new hosting and make sure you’re using the same version of PHP:
      • New host login details (cPanel/Plesk/dashboard).
      • FTP login details for the new server.
      • Database name, username, and password for the new server (you might need to create these).
    5. Plan Your Domain Name Strategy:
      • Keeping the Same Domain: This is the easiest scenario. You’ll simply update your DNS pointers after the move.
      • Changing Domain Name: This adds an extra layer of complexity, as you’ll need to update all instances of the old domain name within your database.

    Step 2 – move the site

    1. Point the Nameservers or hosting DNS at the new site
    2. Install WordPress on the new host
    3. Update the setting to mirror the old site such as PERMALINKS
    4. uploads your WP-CONTENT folder via FTP to overwrite the new one. This is the folder which contains things like the plugins, themes and images
    5. Log in to the new database and import your SQL dump
    6. Re-activate the plugins and theme on the new site
    7. Any broken links (you can scan it), you can update them manually or use a plugin such as Better Search & Replace