Author: Christophe

  • HMO Application Floor Plans: Your Options and What They Cost

    HMO Application Floor Plans: Your Options and What They Cost

    If you’re applying for a House in Multiple Occupation (HMO) licence, the floor plan is one of the documents most likely to hold things up. Inaccurate measurements are the most common reason councils delay or refuse licences. Some councils are already slow. Sheffield, for example, reports HMO applications taking more than 16 weeks due to high demand, so sending a plan that needs redoing is expensive in time as well as money.

    There are several ways to produce the plan, from free to a few hundred pounds. Here’s how they compare.

    What the plan needs to show

    Requirements vary by council, but most want the same core information:

    • Every room labelled, with dimensions and floor area in square metres.
    • The national minimum bedroom sizes: 6.51 m² for one adult and 10.22 m² for two. Floor area where the ceiling is lower than 1.5 metres doesn’t count, so sloping attic ceilings need marking.
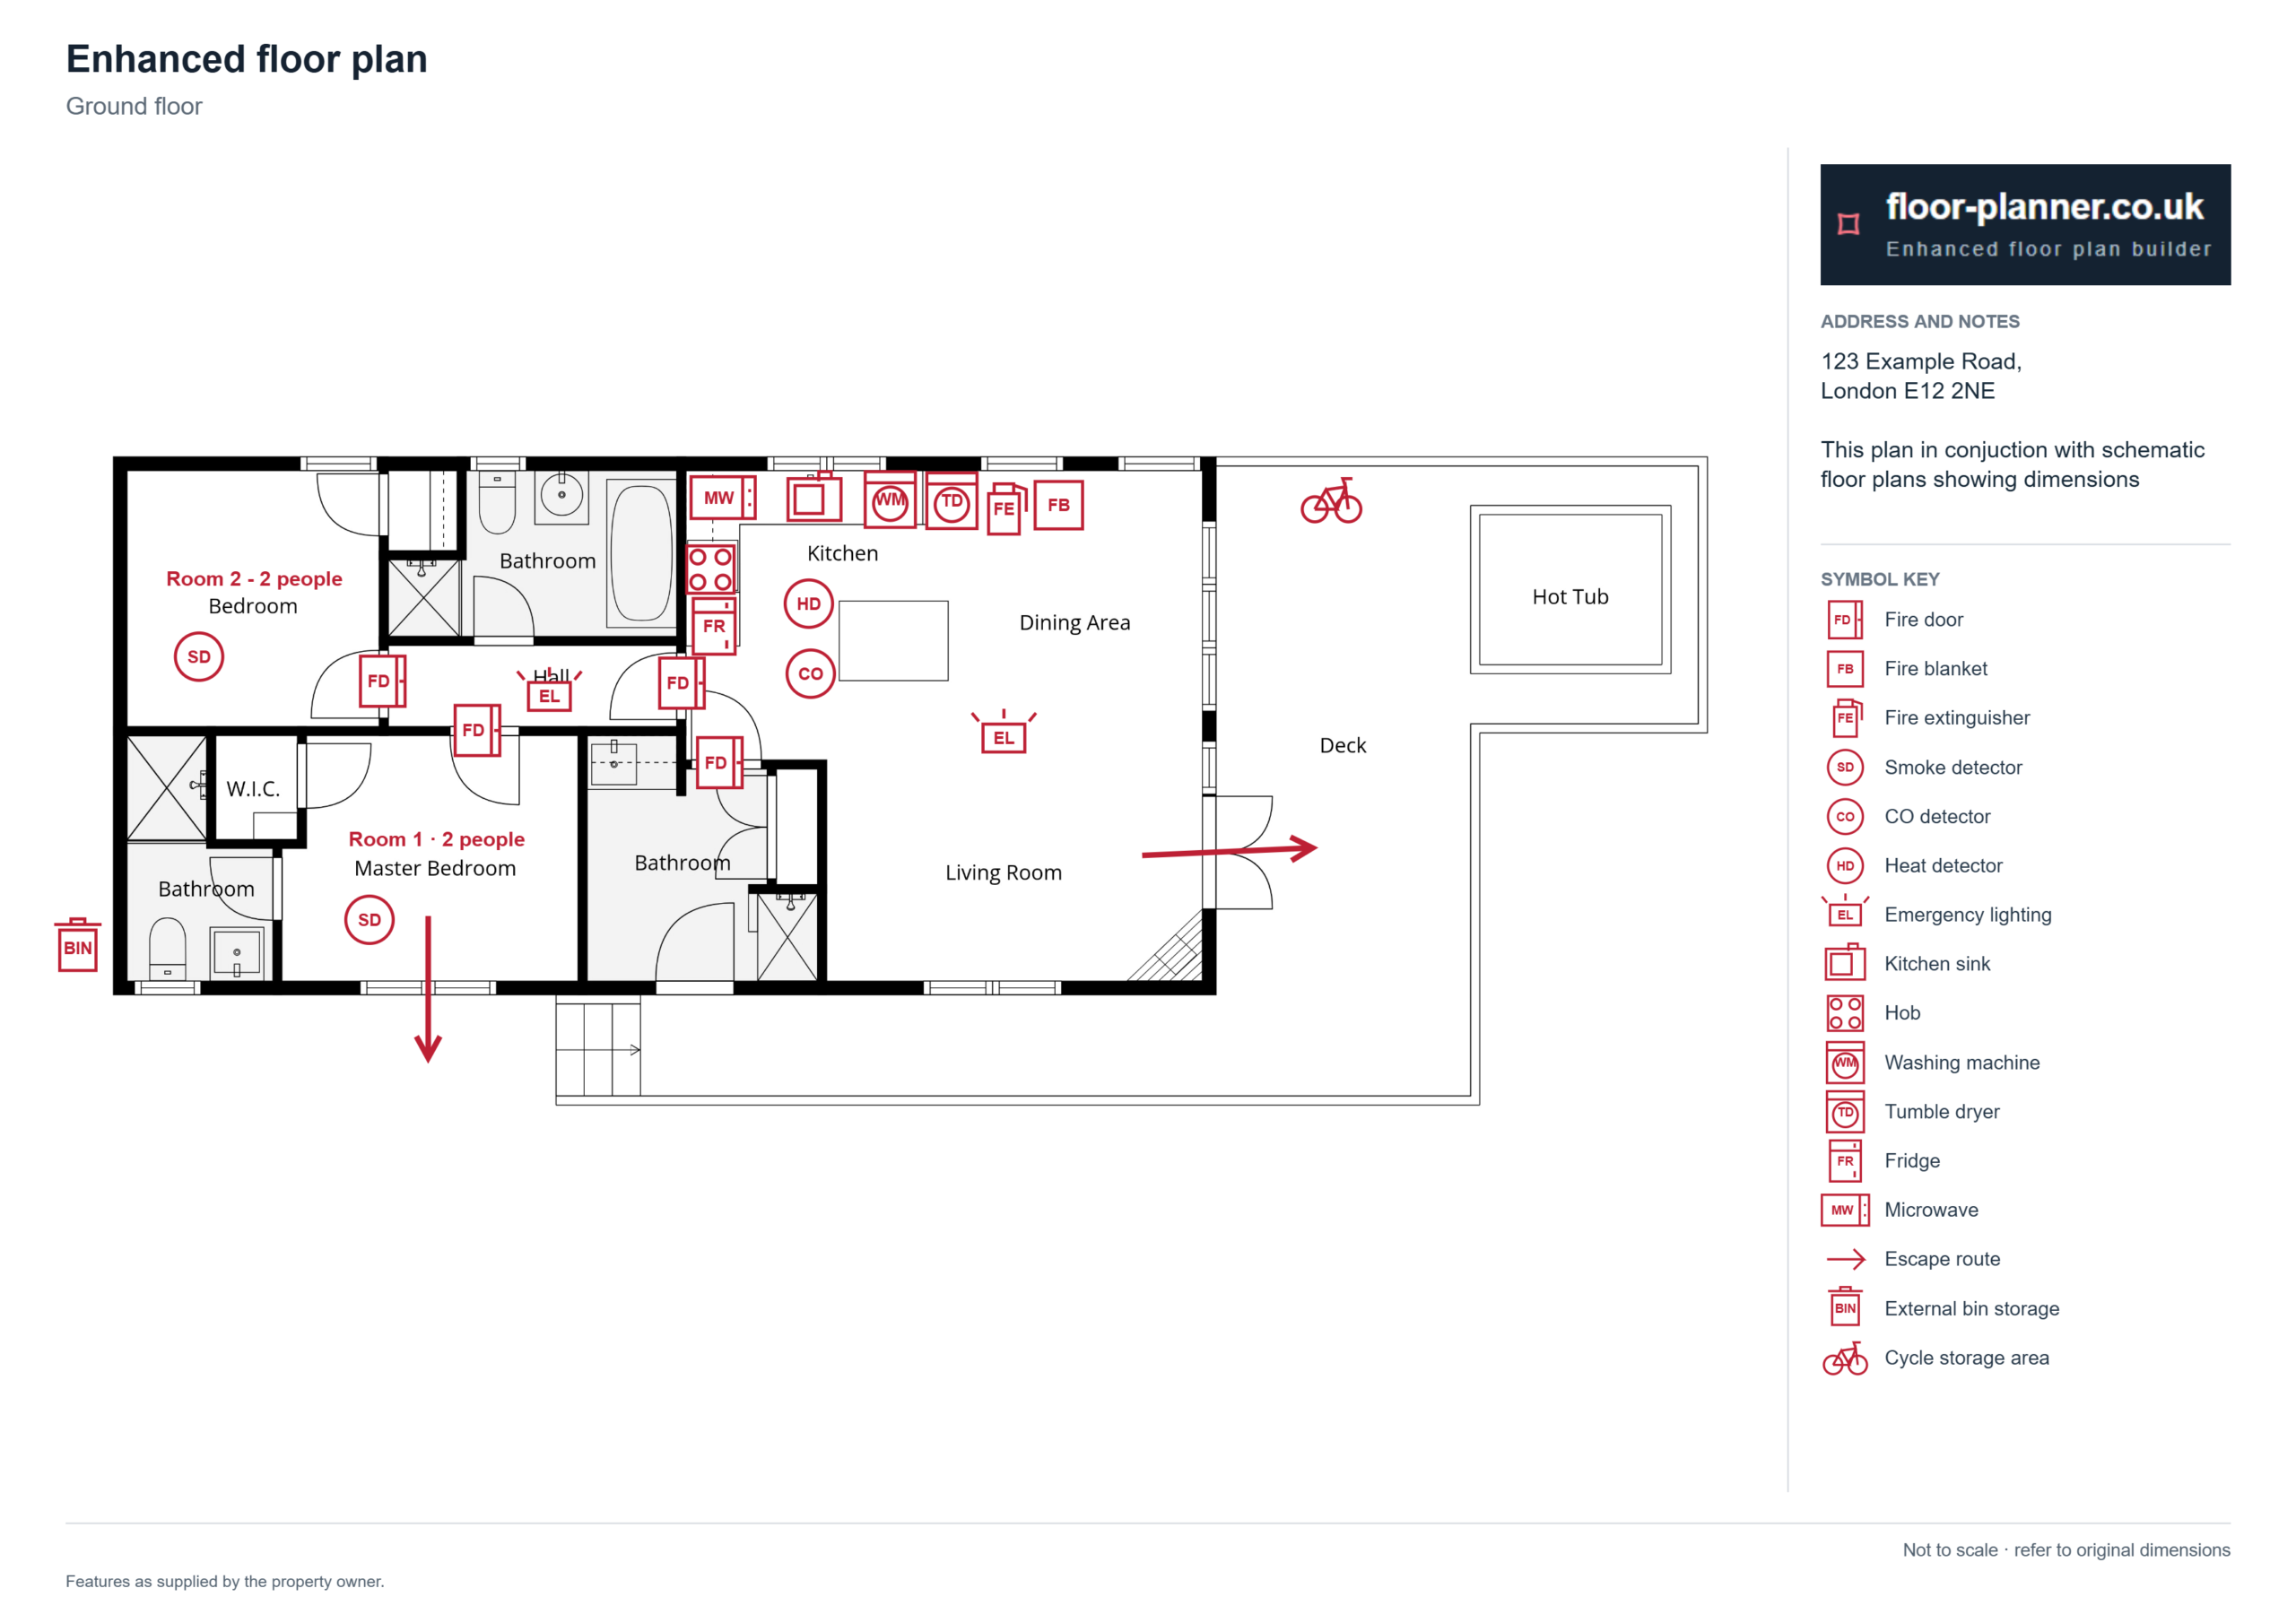
    • Fire safety equipment: fire doors, interlinked smoke detectors, kitchen heat detectors, carbon monoxide alarms, fire blankets and extinguishers.
    • Windows, escape routes, and the position of kitchen and bathroom facilities.

    Scale expectations differ. Sheffield expects professional, scaled drawings, typically 1:50 or 1:100. Others are more relaxed. Epsom & Ewell says plans must show room dimensions in metres but needn’t be drawn to precise scale. Check your own council’s guidance before choosing an option.

    Option 1: Hand-drawn plan plus floor-planner.co.uk (free)

    You measure the property yourself, sketch each floor, and upload it to floor-planner.co.uk. The tool lets you place symbols, mark escape routes, and download a finished application sheet.

    • Best for: landlords with a single straightforward property and a council that accepts unscaled plans.
    • Watch out for: the sheet isn’t to a calibrated print scale, though original measurements are preserved. Any measuring errors are yours, and those cause most delays.

    Option 2: Professionally produced floor plan plus floor-planner.co.uk (from £45)

    A surveyor measures the property and supplies a clean schematic plan, which you then annotate with the fire safety symbols. 3Dtour.site charges from £45 for a studio or 1-bedroom, £60 for 2–4 bedrooms, £75 for 5–6 bedrooms and £90 for 7–9 bedrooms. Travel is extra, at £10 per 15 minutes plus 45p per mile, and no VAT is added.

    A 6-bed HMO with about 30 minutes’ total travel and 10 miles’ mileage would come to roughly £75 plus £24.50 travel, around £100 in total, before you add symbols yourself.

    • Best for: most landlords. Accurate measurements at low cost, with you controlling the compliance detail.

    Option 3: Specialist HMO floor plan companies (roughly £140 to £600)

    These firms produce the whole plan including fire safety symbols, often with a site visit. Prices vary widely by region, property size and whether a visit is needed. One industry guide puts a licensing plan from an existing survey up-to £250, and a combined survey plus licensing plan at up-to £500.

    • Best for: larger or complex properties, landlords who want it done for them, or councils with strict drawing standards.

    Option 4: LiDAR-measured plan plus floor-planner.co.uk (from £250)

    A LiDAR or Matterport-style scan captures the whole interior in one visit. At 360 Virtual View, the camera’s infrared sensors scan the interior to produce schematic floor plans accurate to within 1%. Virtual tours start from £250. You then add the HMO symbols in floor-planner.co.uk.

    • Best for: awkward layouts, attic conversions, larger houses, or landlords who also want a 3D tour for marketing or record-keeping. 3Dtour.site‘s Matterport tours run from £250 to £450 depending on size, including first-year hosting.

    Price comparison

    Option / supplierWhat you getIndicative priceNotes
    Hand-drawn + floor-planner.co.ukDIY plan, symbols and escape routes added onlineFreeAccuracy depends on your own measuring
    3Dtour.site (Sheffield)Measured schematic floor plan£45 (studio/1-bed), £60 (2–4 bed), £75 (5–6 bed), £90 (7–9 bed)Travel extra; no VAT; payment in advance. You use floor-planer.co.uk to produce the application
    360 Virtual View (Sheffield & Bakewell)LiDAR/Matterport scan with schematic planVirtual tours from £250HMO-specific plans by quote
    Go2Plans (London & Home Counties)HMO application plans, colour or B&WFrom £139Regional
    Smart Property Service (London, Herts, Beds, Bucks)HMO licensing plan, 24-hour turnaroundFrom £195 (1,000 sq ft), £225 (1,200 sq ft), £275 (1,400 sq ft); no VATRegional
    Lease Planners (London and Suffolk)HMO floor plan£295 + VAT with a site visit, £225 + VAT without, up to 1,000 sq ftPage is over a year old; confirm current pricing
    Council-prepared plan (e.g. Colchester)Plan drawn by the council’s housing team£445 inc. VAT for 5 units, plus £65 per additional roomOnly some councils offer this
    ELC Sales & Lettings (Edinburgh)HMO licensing floor plan£155Scottish licensing rules differ
    Market guide
    (agenthmo .co.uk)
    Measured survey alone£200–£500Benchmark, not a quote
    Fire evacuation plans (e.g. Draw Plans)Formal fire exit/evacuation drawingsFrom £695 + VATA different, more comprehensive product; not normally needed for a licence plan

    Choosing between them

    • Simple property, tight budget: Option 1, provided your council accepts unscaled plans and you’re confident measuring.
    • Most landlords: Option 2 gives professional measurements for under £100 in many cases, and you keep control of the symbols.
    • Complex layout or several properties: Option 4 captures everything in one visit, and the scan can be reused.
    • Want it handled end to end: a specialist provider (Option 3), where the price typically reflects the extra service.

    Whichever you choose, ask your council for its floor plan guidance first. Some publish an example plan and symbol key, and following it closely is the easiest way to avoid a rejected application. Prices above are indicative and taken from suppliers’ published figures, so always get a quote for your specific property.

  • Getting a 3D Tour – The Real ROI for Hotels, Event Spaces and Holiday Lets

    Getting a 3D Tour – The Real ROI for Hotels, Event Spaces and Holiday Lets

    Is a 3D Tour Worth It? The ROI for Hotels, Event Spaces and Holiday Lets

    Most hospitality marketing budgets still go on traffic: ads, listings, SEO. A recent 2026 guide from 3D tour specialists Go Casa argues that the best first investment isn’t more visitors, but making the ones you already get trust what they see. For anyone selling stays or venue hire to people who can’t visit first, that argument deserves attention.

    The problem: guests can’t trust photos

    Wide-angle photography flatters, and guests know it. Rooms look bigger, awkward proportions vanish, and buyers who suspect they’re being sold a polished picture fall back on comparing prices. Even when the photos do win the booking, the gap between image and reality can show up later in disappointing reviews.

    A 3D tour (typically captured with Matterport) lets people walk the space, judge its real dimensions and see how rooms connect, without relying on a photographer’s framing.

    The numbers the guide cites

    The guide reports the following for properties using professional virtual tours:

    • Website dwell time up five to ten times, a strong engagement signal
    • Booking increases of 16% to 67%, a wide range, so treat it as directional
    • 43% more direct bookings, which matters given OTA commissions of 15% to 30%
    • 38% fewer unqualified enquiries, as guests and planners self-qualify by exploring the layout first
    • 40% to 60% more engagement on listings with a 3D tour than on static photos alone

    The cost side

    Capture pricing quoted in the guide runs from roughly £350 to £600 for a holiday rental or villa, £600 to £1,000 for a boutique hotel or small venue, and £2,000 to £5,000+ for a large hotel or conference centre, plus around £15 to £20 a month for hosting.

    The payback logic is simple. If OTA commission is 15% to 30% of each booking, a tour that shifts even a few reservations to direct can cover its cost quickly. For a holiday let, a handful of displaced commissions could do it. For larger venues, one converted event booking may be enough.

    The international angle

    Overseas guests face the biggest information gap. They can’t pop in for a viewing, they may be reading in a second language, and a mistake costs them a flight. A 3D tour is a language-neutral way to reassure them: no translation needed to see the bedroom layout, the step-free access or the view from the terrace. The guide also cites a claim that 70% of international buyers make decisions without visiting in person, which is exactly the situation a tour is built for.

    Event spaces: the remote site visit

    For corporate events, weddings and conferences, planners are often organising from another country or time zone. A 3D tour lets them measure rooms, check sightlines, plan catering flow and share the space with colleagues without booking a site inspection. The guide reports that venues sending a tour link with a proposal remove much of the buyer’s uncertainty, and stresses that speed of response matters: contacting a corporate lead within the first hour can raise conversion by up to 60%.

    Making a tour work harder

    The tour is a starting point, and the guide’s wider hierarchy suggests three ways to get more from it:

    1. Keep the booking button visible. Don’t let a heavy tour or video push availability and pricing below the fold, or guests will head to an OTA.
    2. Give AI search something to cite. Precise facts (room sizes, distances, capacities) are more likely to be picked up by AI assistants than vague descriptions, so pair your tour with specific data.
    3. Use it in every sales channel. Put the link in enquiry replies, RFP responses, email confirmations and OTA listings.

    The takeaway

    For most hospitality businesses, a 3D tour is one of the lower-cost, higher-leverage upgrades available, especially if a large share of your guests or event clients are booking from abroad. Before committing, ask for examples of tours in your sector, check that the platform loads quickly on mobile, and plan how you’ll measure results: dwell time, enquiry quality and direct booking share.

    Source: Go Casa, “The Hospitality Marketing ROI Hierarchy: A Data-Driven Guide to Resource Allocation in 2026.“

  • Digital advertising vs. physical signage – a comparison

    Digital advertising vs. physical signage – a comparison

    As a digital infrastructure agency, we spend our days building WordPress websites and optimising digital growth channels. But we recently reviewed some detailed research from Image Sign, a leading UK signage manufacturer. The data proves a vital point. Physical visibility remains one of the most reliable and cost-effective ways to drive customer acquisition.

    Here are the most interesting discoveries from the research and exactly what they mean for your business strategy.

    The Real Cost of Impressions

    Digital advertising costs are rising rapidly. The average cost per thousand impressions (CPM) on Facebook sits between £7.00 and £10.50. You pay this continually. The moment you stop spending, your visibility vanishes entirely.

    Physical signage operates on a completely different economic model. A high-quality vehicle wrap lasts up to seven years and generates up to 17.5 million impressions annually. This drops the effective CPM to just £0.02 to £0.04. This is a one-off capital expenditure that works 24 hours a day. It is completely unaffected by ad blockers, privacy updates, or algorithm changes.

    Driving Footfall and Revenue

    The psychological impact of a physical sign is immediate. Consumers judge the quality of a business entirely on its exterior. The Image Sign research highlights that 76% of consumers have entered a store they had never visited before based exclusively on the appeal of its signs.

    Furthermore, upgrading on-premise signage results in an average revenue uplift of 12%. In retail analytics, this is measured via the “Store Capture Rate”—the exact percentage of passers-by who cross the threshold into the building. It is the physical equivalent of a website’s conversion rate. Just as a cluttered website homepage drives visitors away, a poorly designed shopfront loses potential revenue instantly.

    The Science of Attention

    Effective design is mathematical, not just subjective. A sign cannot drive footfall if a passing driver cannot read it in time. The research outlines strict rules for visibility. You need at least 60% negative space (the empty background area) around your text to allow rapid cognitive processing. You also need a Light Reflectance Value difference of at least 30 points between the text and the background to ensure standard legibility.

    Business Lessons for Digital Growth

    The data from Image Sign provides three concrete lessons for any business owner:

    1. Balance your spending. Don’t rely solely on digital advertising. Invest in permanent, physical branding assets to lower your overall customer acquisition cost. A balanced marketing portfolio requires both capital expenditure (signs) and operational expenditure (digital ads).

    2. Respect the capture rate. Treat your physical storefront exactly like your website landing page. Clear messaging and high visual contrast turn passive traffic into active buyers.

    3. Design for the user. Just as we build websites for user experience, physical signs require adequate spacing and contrast to be understood in three seconds. Clutter kills conversion in both the physical and digital worlds.

    Physical and digital marketing do not compete

    Physical and digital marketing do not compete. They work together. A strong physical presence drives local brand searches online, which we then capture through solid digital infrastructure. If you need to upgrade your physical visibility, we recommend speaking to the team at Image Sign. And if you need to ensure your website is perfectly structured to convert that newly acquired brand awareness, contact us at Seven Creative.

    Read the full research on the Image Sign website

    Read more of the research from Image Sign on their website www.imagesign.co.uk

  • Try a new type of password based on your location

    Try a new type of password based on your location

    A password that is secure, you don’t need to write down, and can be regenerated easily if you ever forget it

    Imagine you need a new password. You sit on your favourite bench in the local park, press generate, and create a unique password based on your exact location.

    A year later, you realise you have forgetten that password so you go back to the same park bench, press regenerate, and the exact same password appears.

    You don’t need to write your password down, to store it in a password manager, and you don’t need a password hint. You simply remember the location it was based on and you can recreate it again at any time

    This is a new services from PlacePass.me. You simply pick a location – either a virtual location on the map or go to a physical location – then add a PIN number of your chosing and and click generate. You get a strong, complex password based on the three word What3Words location code. And becuase it’s based on three words, it’s also easy to remember.

    But even better than that, if you ever forget the password, you can recreate it by using the exact same location and PIN. This removes the need for insecure written notes or complex password managers.

    The theory behind this idea is that your physical memory works in a different way to abstract memory. Trying to remember a random string of letters, numbers and special characters can be almost impossible, but remembering a physical location is much more natural.

    From a security perspective, writing down passwords is not secure, and password managers aren’t always easy or intuitive to use. Simply remembering a location combined with a PIN number means you don’t need to ever write down the password to be able to keep it.

    Try it for yourself – go to placepass.me and pick a memorable spot to generate your next password.

  • Why your restaurant needs a virtual tour: more bookings, less time answering questions

    Why your restaurant needs a virtual tour: more bookings, less time answering questions

    Restaurant virtual tours help customers explore your venue before they book. You put a lot into making your restaurant somewhere people want to spend time. The décor, the layout, the bar, the private dining room. But how much of that can a potential customer actually see before they visit?

    A restaurant virtual tour lets people walk around your space online, at their own pace, on their phone, tablet or computer. They can look around, explore different rooms and get a much better understanding of what you offer before making an enquiry.

    I produce lots of these tours for restaurants in London, where they are used primarily to promote private dining and event hire. I’m now developing this work in Vannes and the surrounding areas of Brittany, France. The more I see how restaurants use them, the more surprised I am that they aren’t standard practice.

    How restaurant virtual tours help sell your event space

    Someone organising a birthday meal, wedding reception or company dinner needs to know more than what’s on the menu. They want to understand the space. Is there a separate room? Where is the bar? How does the dining area connect to the rest of the restaurant? Will the setting suit their guests?

    Photographs are useful, but a virtual tour puts them in context. People can move through the restaurant and understand how everything fits together. A private room tucked away upstairs can become a selling point instead of something customers only discover when they arrive.

    For an organiser comparing several venues, that clarity can help your restaurant make the shortlist. They can also share the tour with colleagues, family or whoever else needs to approve the booking. You don’t have to arrange a separate visit for every person involved.

    Show the restaurant looking its best and add clear information about seated and standing capacities, private hire options and different table arrangements. The tour shows one setup; supporting photographs and information can explain the alternatives.

    Save time on enquiries with restaurant virtual tours

    Restaurant owners tell me how much time a tour saves them. Instead of trying to describe a room over the phone or sending a collection of photographs, they can send one link by email or WhatsApp.

    “Here’s the private dining room we discussed. Have a look around and let me know if you’d like us to check availability.”

    The customer gets useful information immediately, and your team can spend more time dealing with the details of the booking. A tour can reduce unnecessary first viewings and make the visits that do happen more productive.

    You can even send a link to a particular view. On a computer, move to the spot you want to show in the Matterport tour, face the right direction and press U to generate a link to that view. It is particularly handy for highlighting a private room, a table arrangement or the connection between two spaces. See Matterport’s guidance on deep links.

    Help new customers feel comfortable before they arrive

    A virtual tour is useful for ordinary restaurant bookings too. Customers can get a feel for the setting and decide whether it suits a quiet meal, a family gathering or a special occasion.

    People visiting Vannes from elsewhere in France or overseas can explore before travelling. For someone arranging a group meal from a distance, being able to see the venue makes planning easier.

    Guests can also look at entrances, steps and the route through the restaurant before asking specific questions about access. Keep accurate written accessibility information alongside the tour, and invite people to contact you about their requirements.

    Give yourself something interesting to share on social media

    A tour gives you more to talk about than another photograph of a plate of food. You can invite people to explore, introduce your private dining room or show a part of the restaurant they might not know exists.

    There are plenty of angles: “Planning a birthday meal?”, “Have you seen our upstairs room?” or “Take a look around before booking your Christmas party.” One tour can support different posts throughout the year.

    Share a strong photograph or a short screen recording with an invitation to explore the full tour. Use a clickable link where the platform supports one, or direct people to your profile link. The interactive tour opens through that link; it does not need to run inside the social post itself.

    How to use restaurant virtual tours in your marketing

    The biggest mistake is having a tour produced and then leaving the link sitting in an email. Put it wherever customers are deciding whether to book.

    Embed it on your website

    Give the tour a prominent place on your restaurant website, particularly on private dining and event hire pages. Matterport provides embed code so visitors can explore without leaving your page. Include a clear “Take a look around” heading and put your booking or enquiry button nearby.

    Add useful written information around it: capacities, hire options, location and how to enquire. That helps customers and gives search engines readable information about your offer. A tour should complement the page, not replace its contents.

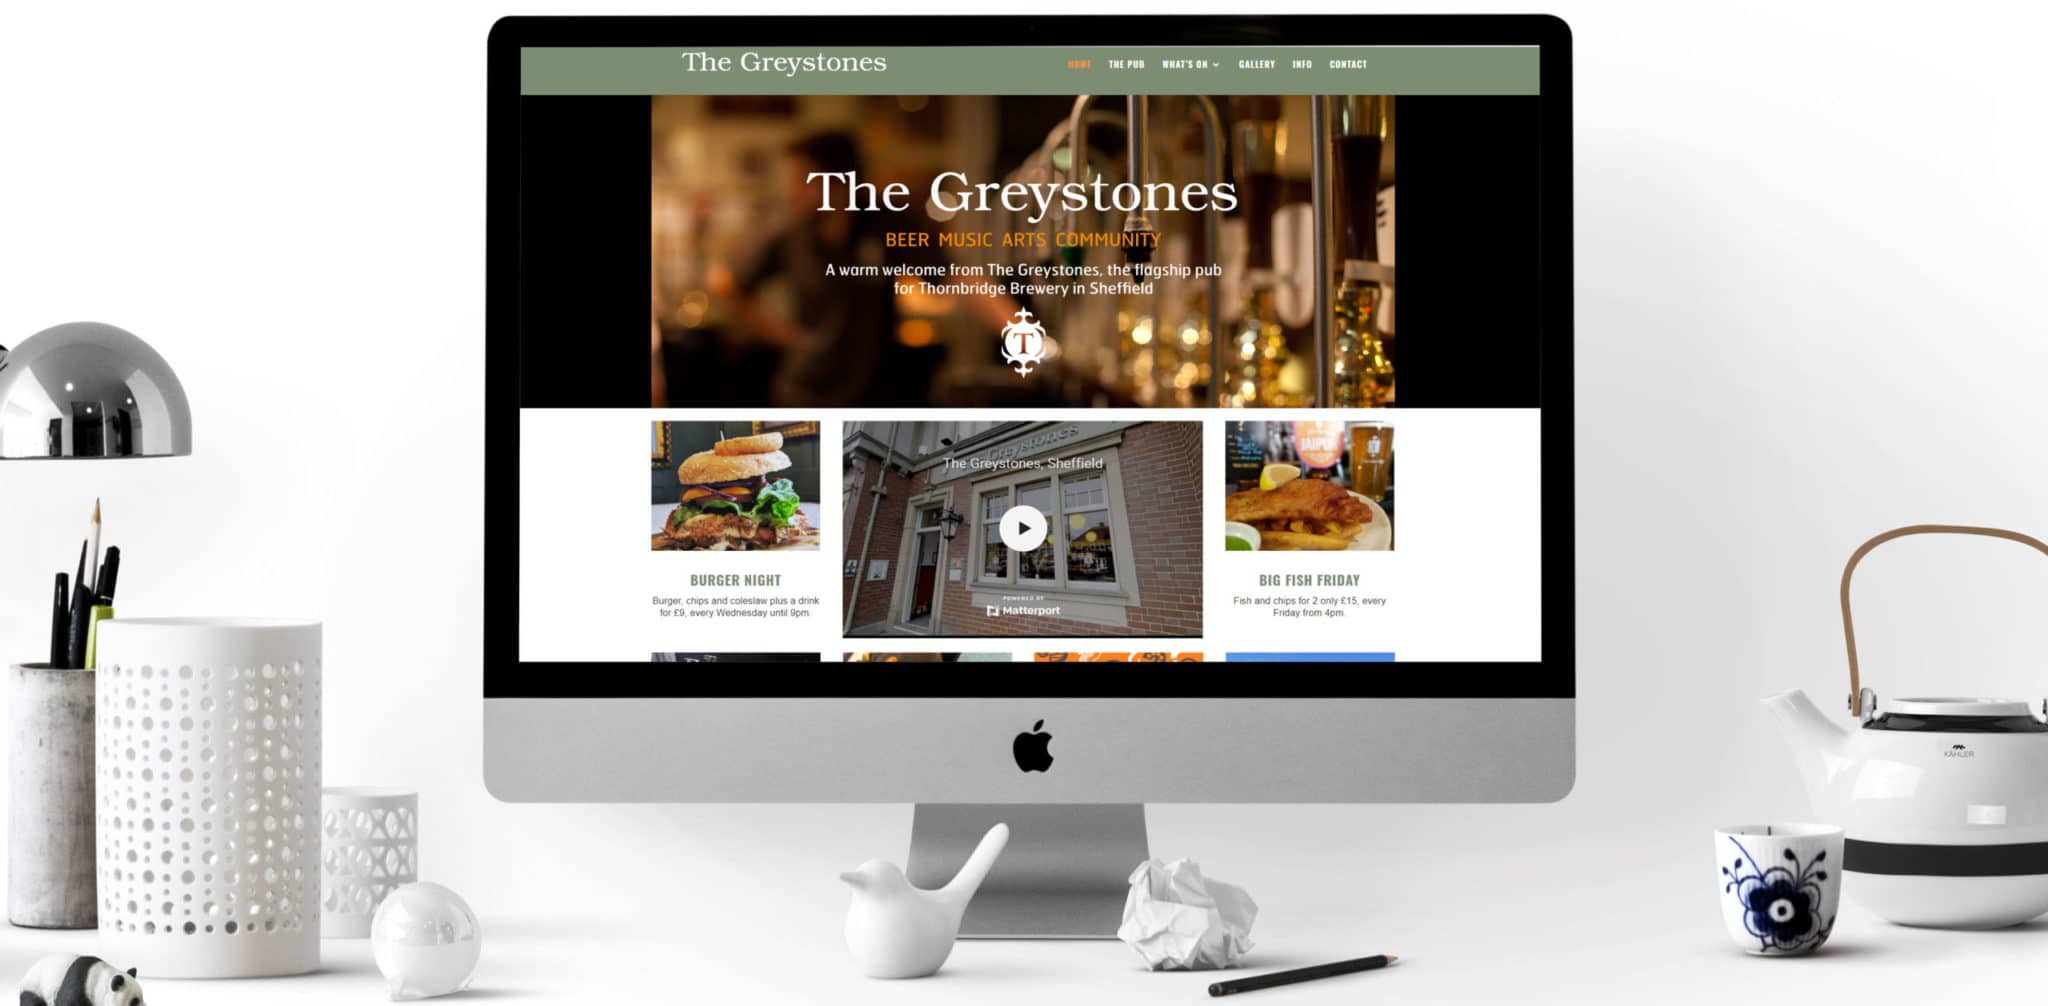
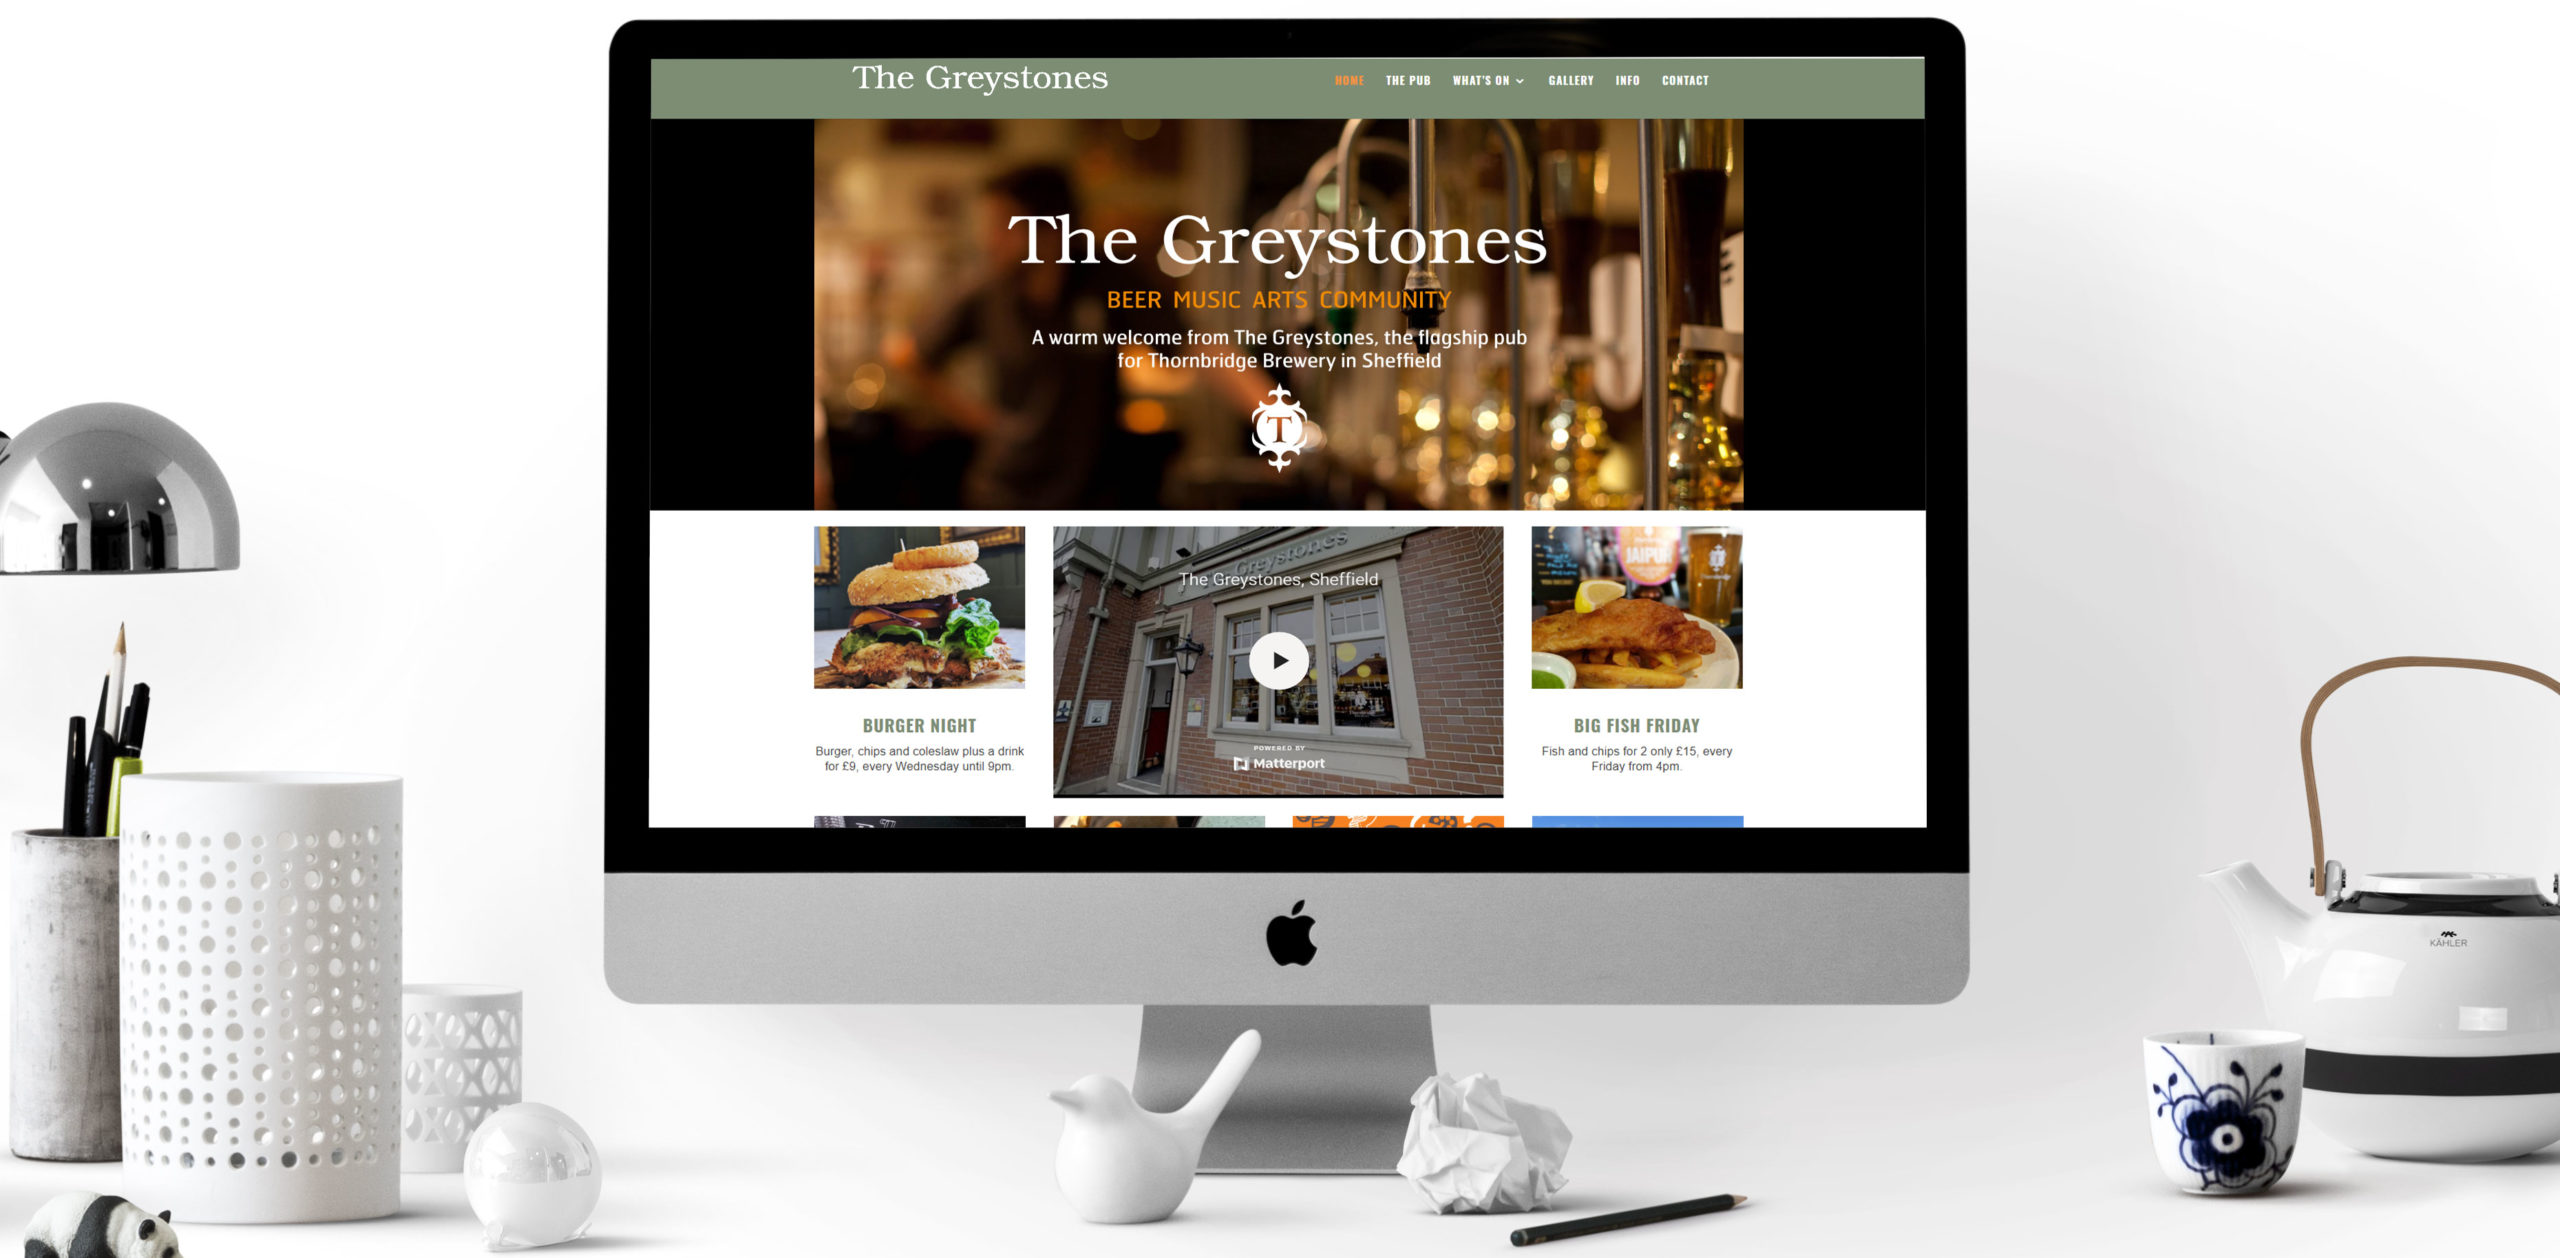
    The Greystones pub website showing how virtual tours can be embedded on a venue page
    An example from our venue work: The Greystones pub website with an embedded tour. Restaurant virtual tours can be presented in the same way.

    Make it part of your enquiry process

    Add the link to email signatures, private hire proposals and replies to group booking enquiries. Keep a few links to specific views ready for your team to copy into email or WhatsApp. Include them in follow-up messages so people can revisit the space when discussing it with others.

    Use QR codes in your window and printed marketing

    A QR code can take someone straight from a flyer, leaflet, advert or restaurant window into the tour. Someone walking past while you’re closed can still look inside. A person reading your event brochure can explore the room immediately.

    Give the code a clear invitation, such as “Scan to look around” or “Explore our private dining room”. Test it on a phone at the size it will be printed. For materials you intend to use for a long time, link to a page on your own website containing the tour, so you can update the tour without reprinting everything.

    Add useful information inside the tour

    Clickable information points can provide text, links and supported media within the space. A customer looking at the private dining room could open an event menu, watch a film showing a different setup or follow a link to enquire.

    Keep those points useful and easy to understand. A few well-placed answers and clear next steps will usually do more than filling every corner with information.

    Get more photography from the same visit

    While I’m at your restaurant, I can also produce high-quality images using the Matterport camera or my Canon camera. We can plan the photographs around what you need: interiors, private dining, table settings and details that show the character of the venue.

    That gives you material for your website, social posts, brochures and event proposals alongside the tour. Agreeing the photography requirements before the visit helps us make the most of the time and have each space ready.

    Restaurant virtual tours: what about return on investment?

    The commercial value comes from additional bookings, time saved handling enquiries and marketing material you can keep using. The tour needs to be visible and actively used for those benefits to happen.

    Our restaurant virtual tours start from £350 in the UK or €350 in France. To judge the return, compare the full cost of your agreed package with the additional profit the tour helps generate, rather than the total value of a booking.

    For example, if an additional private dining booking leaves £175 after the costs of serving that booking, two genuinely additional bookings would cover a £350 tour. The same calculation works with €175 and €350. This is an illustration, not a forecast, and any hosting, photography or other agreed charges should be included in your total cost.

    Time saved matters too. If the tour saves your team 15 minutes on eight enquiries a month, that is two hours a month available for other work. It is useful capacity, even if it does not directly reduce your wage bill.

    Ask event customers whether they used the tour, track enquiries from the page where it appears and record when it saves a viewing. Where possible, use separately tracked links for social posts and QR campaigns. Review those results alongside confirmed bookings and seasonal changes, rather than treating tour views alone as a return.

    Restaurant virtual tours in London, Vannes and surrounding areas

    My London restaurant work has shown me how useful a 3D tour can be for promoting event spaces. I’m bringing that experience to restaurants in Vannes and the surrounding area, helping owners show what makes their venue worth booking.

    Whether you want to promote a private dining room, attract more group bookings or simply make it easier for people to choose your restaurant, a virtual tour gives you a practical tool you can use every day.

    Prices start from £350 / €350. Email info@sevencreative.co.uk with your restaurant’s location and what you would like to show. We can discuss the tour, any accompanying photography and how you will use it, then confirm the scope and price before booking.

    Explore our Matterport tour services and examples, or read more about our 3D tour production across the UK and France.

  • Cloudflare Turnstile – alternative to Google reCAPTCHA

    Cloudflare Turnstile – alternative to Google reCAPTCHA

    How to integrate Cloudflare Turnsile into Contact Form 7 in WordPress – an alternative to Google reCAPTCHA

    Cloudflare Turnstile is a free system that protects websites from bots and spam without using frustrating puzzles. It replaces traditional CAPTCHAs, such as Google reCAPTCHA.

    Instead of making visitors click on pictures of traffic lights or decode blurry text, Turnstile runs silent background checks in the browser. It looks for human-like behaviour and device characteristics to verify the user automatically.

    This helps website owners in two main ways:

    • Better user experience: Real visitors do not have to stop and solve puzzles just to submit a contact form or log in.
    • More privacy: Cloudflare does not track user data for targeted advertising.

    Since version 6.1, Contact Form 7 includes built-in support for Cloudflare Turnstile. This works without installing any extra third-party plugins.

    How to swap Cloudflare Turnstile for Google reCAPTCHA in Contact Form 7 on WordPress tutorial

    1. Log in to your WordPress dashboard. The Contact Form 7 plugin should be installed first.
    2. Click on Contact in the left-hand menu, and then select Integration. Scroll down to Turnstile
    3. Log into Cloudflare and go to the Turnstile page: https://dash.cloudflare.com/a77c8bd1601419249e2175657290b5aa/turnstile
    4. Use the ‘Setup with Spin’ option on the Turnstile dashboard. Add your domain name in the pop-up box to generate your keys.
    5. Copy and paste your Site Key and Secret Key into the on your website from step 1 then save your changes
    6. Delete your old Google reCAPTCHA keys
    7. Test your Contact Form 7 webform
  • Matterport 3D tour providers throughout the UK & France

    Matterport 3D tour providers throughout the UK & France

    Matterport 3D tours are exact digital copies of physical spaces. They provide a fully interactive walkthrough that users control directly from their web browser or phone. Instead of looking at flat photographs, a visitor moves through the property step by step to get a true sense of scale, flow, and layout.

    Organisations commission these tours because showing a physical location in person takes time, money, and coordination. A 3D tour solves this problem permanently. It allows a business to show their space to anyone, anywhere, at any time. This helps to secure faster decisions from clients and cuts down on wasted in-person viewings.

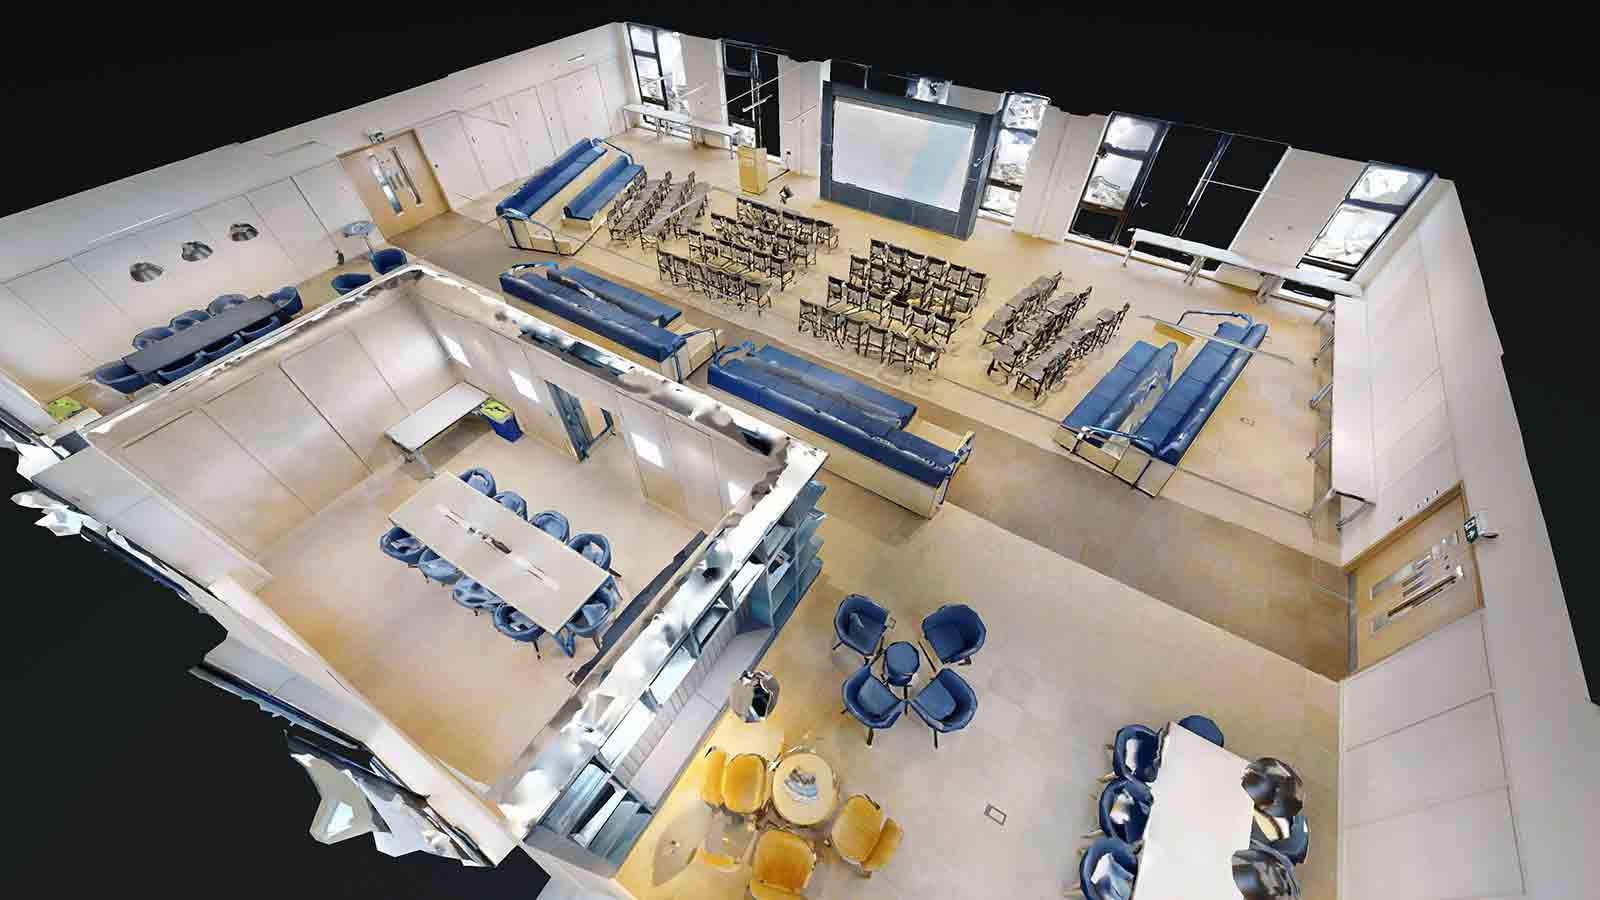
    To produce a tour, a technician uses a specialised 3D camera equipped with infrared sensors and LiDAR technology. They place the camera on a tripod, and it rotates to capture high-definition imagery while measuring the exact dimensions of the room. The operator moves the camera through the building to capture every angle. Afterwards, software stitches all this visual and spatial data together to build the final digital model, complete with a navigable floor plan and a ‘dollhouse’ view.

    Businesses use these digital twins across multiple sectors for very specific reasons. Hotels, holiday lets, and event spaces use them to prove their facility meets a client’s needs before a booking is made. Factories use them to run remote safety audits and demonstrate their production capacity to overseas buyers without bringing them onto the factory floor. And architects extract the underlying spatial data to create precise floor plans for renovation projects. This works to eliminate repeat site visits and keeps projects moving efficiently.

    Matterport providers UK & France

    The following list are Matterport Providers working within the UK & France

    Inside The Factory

    Inside The Factory provides industrial visual data, safety training tools, and site auditing solutions. It specialises in creating immersive Matterport 3D digital twins and precise spatial data—like BIM and CAD files—for manufacturing, warehousing, and engineering facilities. This helps industrial clients run zero-downtime safety tours, train new staff remotely, and show their exact production capacity to overseas buyers without requiring a physical site visit.

    Visit: insidethefactory.co.uk

    3D-Tour.co.uk

    3D Tour provides interactive virtual walkthroughs and spatial capture services. It helps businesses digitise their physical locations so customers can explore them remotely from any device. This works to give viewers a realistic sense of scale, layout, and atmosphere for commercial or residential properties before they visit in person.

    Visit: 3d-tour.co.uk

    Go Casa

    Go Casa specialises in premium Matterport 3D virtual tours for the UK and French hospitality sectors. It focuses specifically on high-end event spaces, hotels, holiday villas, and ski chalets. This helps venue owners increase their bookings and drastically reduce wasted in-person viewings. The service also supplies drone aerial imagery, HDR photography, and 3D floor plans to create an inviting showcase for prospective guests and event planners.

    Visit: GoCasa.me

    360 Virtual View

    This is your general catch-all platform for spatial capture services throughout the UK. It covers a broad mix of Matterport tours, 3D floor plans, drone photography, and VR experiences. It caters to a wide variety of sectors, from commercial real estate to education and retail. It provides a professional, highly technical service that gives businesses the digital assets they need to integrate with platforms like Google Street View, Rightmove, and architectural CAD software.

    Visit: 360VirtualView.co.uk

    virtual-tour.uk

    This platform focuses specifically on industrial and commercial environments, specialising in Matterport virtual tours and LiDAR scanning for factories, workshops, and warehouses. It provides ultra-precise 3D object scanning, indoor drone filming, and factory photography. This helps manufacturing clients capture metrology-grade data, document their complex spaces with high accuracy, and share their facilities safely with remote stakeholders.

    Visit: virtual-tour.uk

    3D Tour Site

    3D Tour Site creates interactive 360-degree virtual tours, schematic floor plans, Matterport Virtual Tours, and digital spatial visualisations for commercial businesses, real estate, and public facilities. Their services focus on capturing physical spaces to produce navigable walkthroughs that integrate seamlessly into client websites, helping potential buyers or visitors explore environments remotely. Based in Perm, Russia, the company primarily operates throughout the local Perm Krai region, supplying regional businesses with interactive digital marketing and spatial scanning solutions.

    Visit: 3dtour.site

    Floor-Planner.co.uk

    Floor-planner.co.uk lets you create enhanced floor plans for your property, including plans to support an HMO licence application. You can work on your plan in your browser, download an editable copy to make changes later, and export the finished version as a PNG, JPG or PDF for printing, sharing or including with your application. It’s a practical way to prepare and update property plans without needing specialist design software.

    Visit: floor-planner.co.uk

    Seven Creative

    Seven Creative provides Matterport 3D tours and architectural, engineering and construction (AEC) services, including LiDAR scanning, point clouds, BIM files and detailed floor plans. We capture buildings and spaces to create practical digital resources for architects, surveyors, designers and construction teams, supporting everything from documenting existing conditions to planning refurbishments. Whether you need an interactive virtual tour, measurements or building data for your CAD or BIM workflow, we can tailor the service to your project.

    Visit: sevencreative.co.uk

  • Transforming Industrial Operations: How Inside the Factory Leverages 3D Digital Twins for Manufacturing, Safety, and Site Audits

    Transforming Industrial Operations: How Inside the Factory Leverages 3D Digital Twins for Manufacturing, Safety, and Site Audits

    Manufacturing environments and industrial facilities operate on fine margins where operational efficiency, safety compliance, and facility uptime directly dictate commercial success. Managing a complex industrial site—whether an advanced manufacturing plant, a chemical processing facility, a food production factory, or a logistics distribution center—requires detailed spatial understanding. Yet, for decades, operations leads, EHS (Environmental, Health, and Safety) managers, and plant engineers have relied on static 2D floor plans, outdated CAD drawings, and time-consuming in-person site walk-throughs to make critical decisions.

    This reliance on legacy site management creates operational friction. Coordinating physical site visits for corporate executives, third-party auditors, equipment vendors, and engineering contractors takes valuable time, increases administrative overhead, and risks interrupting active production lines. When modifications are planned, missing or inaccurate spatial dimensions can lead to expensive site clashes during equipment installation, extended maintenance shutdowns, and safety oversights.

    Inside the Factory (insidethefactory.co.uk) bridges the gap between physical industrial assets and digital management systems. By deploying high-precision Matterport 3D capture technology, LiDAR spatial scanning, and tailored visual data solutions, Inside the Factory creates immersive, dimensionally accurate digital twins of industrial facilities.

    At Seven Creative, we build the digital infrastructure that fuels business growth. In this deep dive, we examine how Inside the Factory is revolutionizing industrial facilities management, plant safety, contractor onboarding, and capital expenditure planning through industrial 3D digital twins.

    1. What Is an Industrial Digital Twin?

    An industrial digital twin is a high-resolution, dimensionally accurate, 3D visual replica of a physical facility. Unlike static 2D floor plans or 360-degree virtual photography tours, an industrial digital twin constructed via Matterport Pro3 LiDAR technology combines true spatial depth, photorealistic visual imagery, and interactive data layers.

    When an industrial site is digitized by Inside the Factory, the resulting model acts as a single, accessible source of truth for every department in the business. Stakeholders can navigate the facility from a web browser, measure clearances down to the millimetre, tag machinery with operational documentation, and conduct virtual walkthroughs without ever putting on a high-visibility vest or stepping onto a noisy factory floor.

    The Evolution from Photogrammetry to LiDAR Accuracy

    Early attempts at digital factory modeling relied on standard photogrammetry, which often failed in industrial spaces due to complex pipework, reflective metallic surfaces, and high-ceiling structures. The adoption of laser-based LiDAR scanning—such as the Matterport Pro3 system—changed the equation.

    LiDAR active sensors emit millions of laser pulses per second, measuring spatial depth with extreme accuracy up to 100 metres away, even in direct sunlight or dim indoor plant environments. This spatial accuracy transforms a virtual tour from a simple marketing asset into a reliable engineering tool.

    2. Core Operational Use Cases for 3D Factory Scanning

    Deploying 3D digital twins across manufacturing plants and warehouse operations delivers measurable returns across six distinct operational domains:

    A. Remote Site Auditing and Regulatory Compliance

    Industrial facilities are subjected to strict regulatory oversights, including ISO standards, health and safety inspections, environmental audits, and insurance evaluations. Traditional audits require scheduling auditors to be physically present on-site, managing security clearances, arranging safety escorts, and coordinating around shift patterns.

    Inside the Factory enables remote, desktop-based site auditing. Auditors can walk through the facility virtually, inspect machine guarding, verify fire exit access routes, evaluate eye-wash station positioning, and review floor marking compliance.

    • Reduced Audit Preparation Time: External inspectors can conduct pre-audit reviews via the digital twin, reserving on-site time exclusively for physical verifications.
    • Historical Compliance Records: Time-stamped 3D scans provide an indisputable record of physical site conditions at any given moment, establishing audit trails for insurance and compliance boards.
    • Cross-Site Benchmarking: Corporate EHS teams managing multiple facilities across the UK and Europe can benchmark safety standards across sites without traveling between locations.

    B. Environmental, Health, and Safety (EHS) Training

    Onboarding new plant operators, shift workers, and temporary staff presents inherent safety risks. Introducing uninitiated workers directly onto an active factory floor can disrupt production and increase workplace injury risks.

    With an industrial digital twin generated by Inside the Factory, EHS managers can build interactive, immersive safety training modules:

    • Virtual Site Inductions: New hires complete initial walkthroughs virtually, familiarizing themselves with emergency egress routes, assembly points, first aid stations, and Lockout/Tagout (LOTO) points prior to their first physical shift.
    • Interactive Hazard Identification: Safety managers embed interactive “Mattertag” multimedia markers directly at hazardous zones, machine pinch points, chemical storage areas, and high-voltage panels.
    • Standard Operating Procedure (SOP) Integration: Link physical machinery in the 3D model directly to video SOPs, PDF equipment manuals, and digital sign-off forms.

    C. Streamlined Equipment Maintenance and Asset Management

    In high-throughput industrial environments, unplanned downtime is exceptionally costly. Maintenance technicians often waste time searching for specific valves, electrical panels, or utility drop points spread across massive facility footprints.

    By integrating 3D visual data into Computerized Maintenance Management Systems (CMMS) or Enterprise Asset Management (EAM) platforms, Inside the Factory simplifies asset localization:

    • Asset Tagging: Maintenance teams tag physical equipment inside the model with asset IDs, serial numbers, operational manuals, and part replacement schedules.
    • Pre-Task Briefings: Technicians inspect the physical workspace around a broken machine virtually to plan rigging access, scaffold placement, and staging areas before stepping onto the floor.
    • Utility Line Mapping: Map out air lines, cooling water, gas lines, and high-voltage power conduits directly on the model so contractors know precisely where isolation valves are located.

    D. Vendor and Contractor Management

    Bringing outside contractors, original equipment manufacturers (OEMs), and specialized engineers on-site for maintenance or facility upgrades requires extensive coordination. Outside vendors routinely charge high fees for pre-bid site visits, site measurements, and travel time.

    Providing third-party vendors with secure access to an Inside the Factory digital twin fundamentally changes procurement workflows. Contractors can take digital measurements directly within the browser interface, evaluate overhead clearances, verify doorway dimensions for heavy equipment movement, and bid accurately without travel fees.

    E. Facility Reconfiguration and Space Planning

    Manufacturing demands change rapidly. Whether introducing a new production line, optimizing warehouse pallet racking, or reconfiguring a packaging cell for Lean/5S workflows, space planning requires precise spatial inputs.

    Using the measurement tools embedded within Inside the Factory’s Matterport 3D digital twins, plant layout teams can:

    • Verify Forklift Turning Radii: Ensure proposed aisle widths accommodate material handling equipment safely.
    • Test Utility Drop Clearance: Confirm that overhead power, compressed air, and ventilation ducts match proposed machine heights.
    • Optimize Material Flow: Analyze the physical distance between raw material intake, work-in-progress (WIP) storage, and final packing lines to reduce unnecessary travel time.

    F. CapEx Planning, Point Cloud Exports, and Scan to BIM

    For major capital expenditure (CapEx) facility upgrades, plant extensions, or retrofits, architectural and engineering teams require CAD and BIM (Building Information Modeling) compatibility.

    Inside the Factory delivers high-density technical exports alongside hosted 3D walkthroughs:

    Deliverable File Type Technical Specification Primary Engineering / Architectural Use
    E57 Point Cloud High-density 3D spatial coordinate file containing X, Y, Z coordinates and RGB color data. Imported into Autodesk Revit, AutoCAD, or Leica Cyclone for detailed structural clash detection and as-built modeling.
    MatterPak (.XYZ / .OBJ) Structured spatial data package including 3D mesh files and color point clouds. Rapid initial spatial layouts, 3D surface modeling, and preliminary engineering proposals.
    Schematic Floor Plans Professional 2D black-and-white vector plans with dimensions and square footage. Facilities management reference drawings, emergency exit signage, and space allocation planning.
    High-Res Floor Images Scaled orthomosaic ceiling and floor images. Asset tagging reference maps and 2D CAD overlays.

    3. The Financial Return on Investment (ROI) of Industrial Scanning

    Investing in industrial 3D digital twins delivers clear financial returns across multiple business units. By reducing travel, preventing installation errors, and accelerating project schedules, Inside the Factory helps industrial sites lower operational expenses.

    1. Direct Reduction in Travel Expenditures

    For multi-site manufacturing organizations, travel expenses for engineers, auditors, operations leads, and corporate leadership accumulate rapidly. Replacing routine site inspections, preliminary vendor walkthroughs, and safety reviews with digital twin reviews cuts travel budgets significantly while lowering the carbon footprint of plant operations.

    2. Elimination of Costly On-Site Design Clashes

    Discovering that a newly purchased £200,000 piece of equipment cannot fit through an access door, or clashes with an overhead steam pipe during installation, causes severe operational friction. By exporting point cloud data (.E57) from Inside the Factory’s scans into BIM software, engineering teams perform clash detection virtually before equipment arrives on-site.

    3. Shorter Maintenance Shutdown Windows

    Planned maintenance shutdowns in continuous manufacturing facilities cost thousands of pounds per hour in lost throughput. Pre-planning shutdown activities inside a 3D digital twin—mapping out staging areas, scaffolding requirements, crane paths, and tool locations—ensures execution on the floor proceeds without delay.

    4. Why Technical Execution Matters: Scanning Industrial Spaces Correctly

    Scanning an industrial facility is fundamentally different from capturing a residential home or a commercial office space. Industrial environments feature high ceilings, complex steel structures, dynamic lighting conditions, active machinery, and strict safety protocols.

    Working with an experienced provider like Inside the Factory ensures technical execution matches the operational demands of industrial facilities:

    • Targeted Scan Routing: Capturing around active production schedules without stopping live operational lines or putting operators in harm’s way.
    • Purposive Density Mapping: Utilizing higher scan density around complex utility clusters, electrical distribution rooms, and machinery layouts to ensure no spatial detail is lost.
    • EHS Protocol Compliance: Scanners operate fully equipped with site-required Personal Protective Equipment (PPE) and adhere strictly to plant safety inductions.
    • Data Security and IP Protection: Industrial sites often house proprietary manufacturing processes. Inside the Factory implements strict data security protocols, including password protection, restricted access links, and visual blur tools to protect proprietary equipment, employee faces, and sensitive IP.

    5. Sector-Specific Applications Across UK Industry

    Industrial scanning solutions provided by Inside the Factory deliver immediate advantages across a wide range of industrial sectors:

    Advanced Manufacturing and Automotive

    High-tech facilities in hubs like the Advanced Manufacturing Park (AMP) in South Yorkshire operate highly automated production lines. 3D digital twins enable robotics engineers, toolmakers, and plant managers to review cell layouts, robot arm reach zones, and safety interlocks in complete detail.

    Food, Beverage, and Pharmaceutical Production

    Hygienic environments require strict contamination controls. Virtual site visits reduce the need for external personnel to enter cleanrooms, food preparation zones, or bottling lines, maintaining strict hygiene protocols while preserving full operational transparency.

    Logistics, Warehousing, and Fulfillment

    Optimizing vertical rack storage, mezzanine spaces, and conveyor systems requires exact spatial awareness. Digital twins allow logistics managers to evaluate pallet bay spacing, aisle widths, and picking paths virtually.

    Chemical Processing and Heavy Engineering

    Navigating sprawling industrial pipework, pressure vessels, and hazardous containment zones demands thorough safety planning. 3D models provide EHS managers with a safe platform to conduct pre-job briefs, risk assessments, and emergency response planning.

    6. How Seven Creative Supports Inside the Factory’s Vision

    At Seven Creative (sevencreative.co.uk), our mission is to build robust, scalable digital infrastructure that supports commercial growth. Partnering with forward-thinking platforms like Inside the Factory (insidethefactory.co.uk) demonstrates how digital presentation, structured web development, and high-value technical services come together.

    We ensure that complex industrial visual assets—such as heavy 3D digital twins, spatial point clouds, and interactive data sets—are integrated into clean, fast, and accessible web environments. By optimizing page speed, user experience, and search engine architecture, Seven Creative enables industrial service providers to showcase their technical capabilities effectively to corporate decision-makers.

    7. Partnering with Inside the Factory for Your Industrial Digital Transformation

    Industrial operations are evolving rapidly under Industry 4.0 initiatives. Adopting modern spatial capture tools is no longer a luxury reserved for multi-national conglomerates—it is an accessible, cost-effective standard for any UK facility looking to streamline operations, lower travel costs, improve plant safety, and accelerate capital projects.

    Inside the Factory provides the end-to-end technical expertise needed to capture, process, and deploy 3D digital twins for your manufacturing plant, warehouse, or engineering facility.

    Key Benefits of Working with Inside the Factory:

    • UK-Wide Service Coverage: Rapid deployment across South Yorkshire, the Midlands, the North West, and national industrial hubs.
    • High-Accuracy LiDAR Hardware: Capturing precise spatial data using industry-leading Matterport Pro3 technology.
    • Full Data Export Suite: Delivering hosted virtual tours, 2D schematic floor plans, E57 point cloud files, and BIM-ready assets.
    • Tailored Training & Tagging: Adding customized asset tags, EHS documentation, and video links to build a comprehensive visual system of record.

    Take the First Step Toward a Smarter Facility

    Ready to upgrade how your plant handles site audits, safety inductions, and contractor management?

    Visit insidethefactory.co.uk to explore real-world industrial 3D digital twin demonstrations, review technical capabilities, and book a site capture assessment today. For expert guidance on integrating industrial visual data into your digital marketing and web infrastructure, contact the technical web development team at sevencreative.co.uk.

  • A Sheffield Success Story – Mediterranean Microcement Supplies

    A Sheffield Success Story – Mediterranean Microcement Supplies

    For more information about Mediterranean Microcement Supplies visit mediterranean-microcement.co.uk

    When you want a continuous, joint-free finish for your floors, walls, or worktops, Mediterranean microcement is the exact material you need. People often look at the smooth, textured surfaces in modern homes and wonder how to achieve that exact look without removing their existing tiles or enduring a messy renovation. This guide gives you the precise answers. It explains what microcement is, where it works best, and how the application process happens. You will learn the facts about its durability and exactly how to maintain it for the long term. This helps you make the right choice for your property.

    What Mediterranean Microcement Actually Is

    Mediterranean microcement is a highly durable, thin decorative coating. It combines cement, water-based resins, fine aggregates, and mineral pigments. You apply it in layers to create a solid, continuous surface with zero joints or grout lines. The total thickness reaches only two to three millimetres. Despite this thin profile, the material provides extreme resistance to wear, impacts, and daily traffic.

    Contractors apply it directly over your existing surfaces. This works on plasterboard, concrete, wood, and even ceramic tiles. You do not need to demolish your old bathroom or kitchen to install it. This saves you weeks of labour and prevents massive amounts of dust in your home. The material bonds tightly to the substrate below it.

    The Chemical Composition And Strength

    The strength of this material comes from the precise chemical blend. Traditional cement cracks easily because it is rigid. Microcement solves this problem by incorporating advanced liquid polymers and resins. These resins give the cement flexibility. When a building settles or the temperature changes, the flexible microcement moves slightly with the building. This prevents cracking and structural failure.

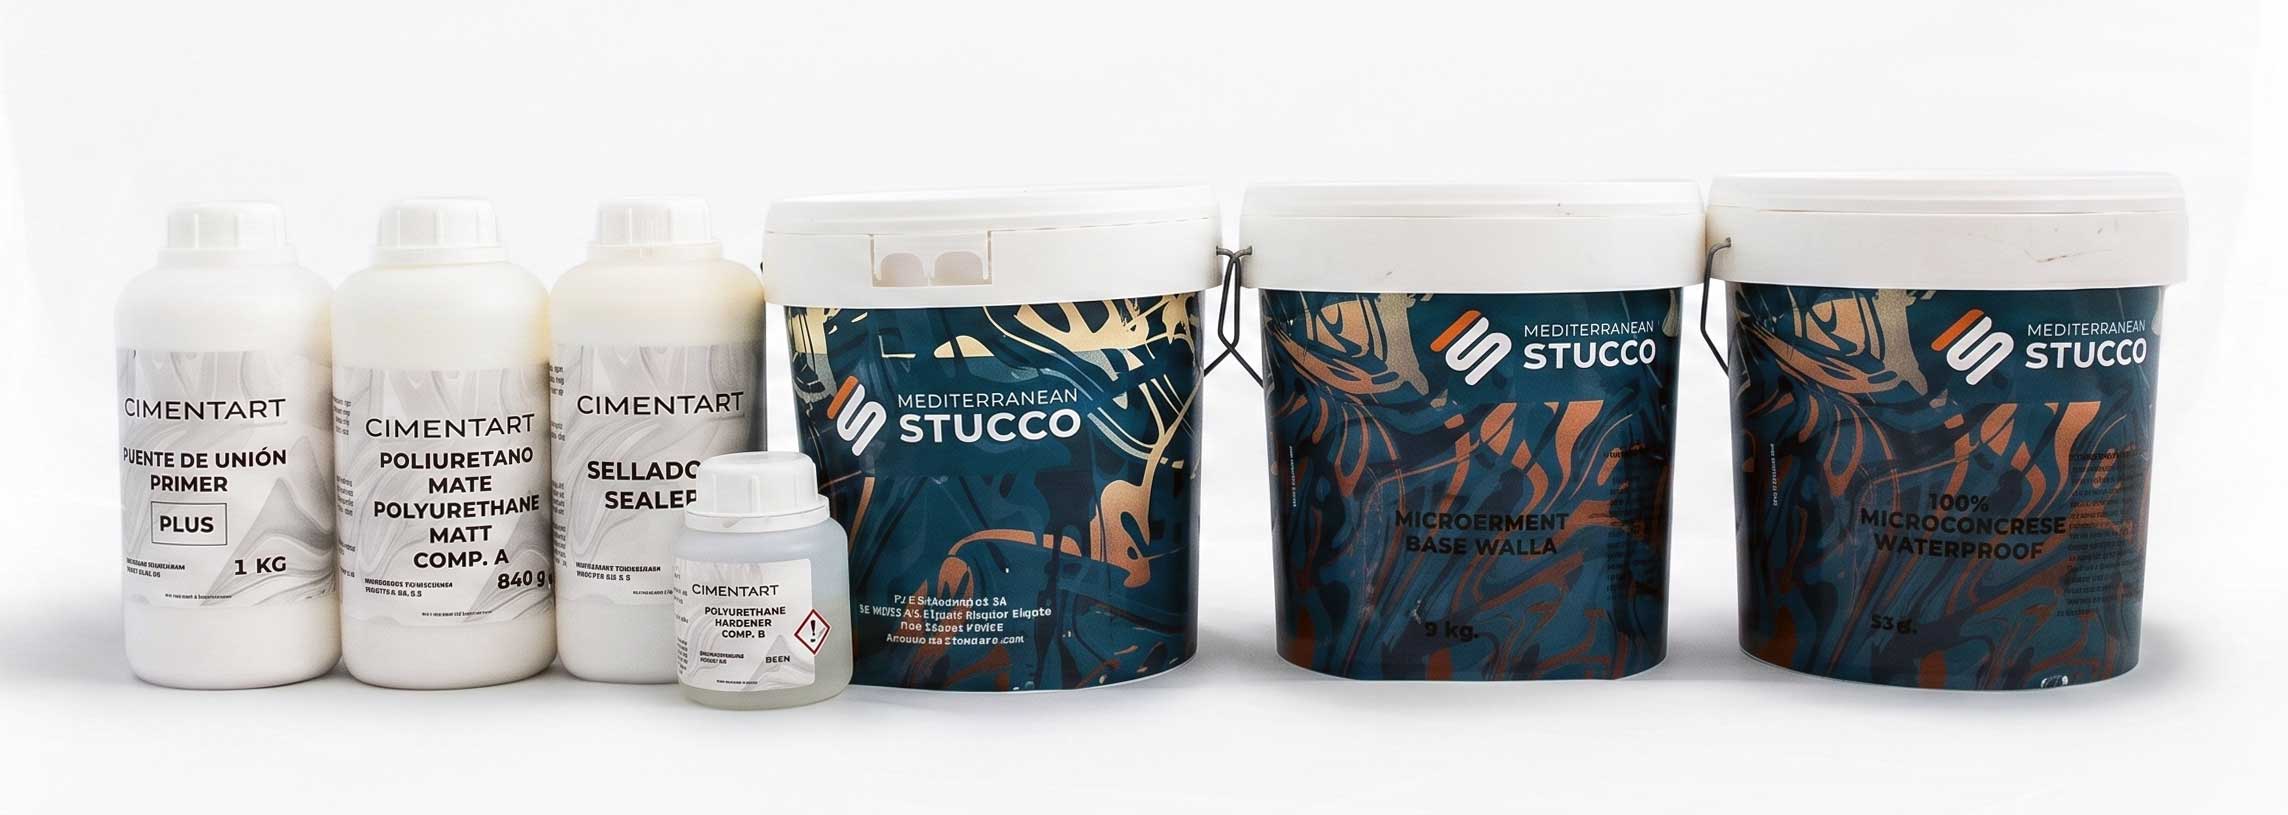
    Brands like CimentArt manufacture specialized versions of this material. Their Aqua Quartz microcement is 100% waterproof straight out of the bucket. Older forms of microcement relied entirely on a top layer of varnish to stop water. If that varnish scratched, water entered the cement and caused dark stains. The new technology changes the chemical structure of the mixture itself. The material repels water naturally. This gives you absolute confidence when using it in wet environments.

    The Visual Characteristics Of The Finish

    The most obvious visual feature is the complete lack of joints. A traditional tiled floor breaks a room into a grid of small squares. Microcement creates one unbroken, sweeping surface. This makes small rooms look larger and connects open-plan living spaces perfectly.

    The application requires skilled trowel work by hand. The installer sweeps the trowel across the wet material, leaving subtle textures and watermarks in the finish. These marks create the classic Mediterranean look. It is an artisanal finish, meaning no two walls or floors ever look exactly the same. You choose the specific texture you want. Some people prefer the highly textured Stone finish. Others prefer the completely smooth Nature finish. The mineral pigments ensure the colour remains uniform, but the light catches the trowel marks to provide natural depth and character.

    The Best Indoor Applications For Your Home

    Microcement transforms interior spaces quickly and cleanly. It works on floors, walls, ceilings, and custom-built furniture. Because it conducts heat efficiently, it is an excellent choice for floors with underfloor heating systems. The heat transfers directly through the thin layers and warms the room quickly.

    If you are planning a renovation and want to buy Mediterranean Microcement, understanding its specific indoor applications ensures you get the best results. It solves many common design problems in high-traffic areas of the house.

    Seamless Kitchen Worktops And Floors

    Kitchens experience heavy foot traffic, spilled liquids, and dropped items. Microcement handles all of this easily. On a kitchen floor, the lack of grout lines means there are no crevices for dirt, crumbs, or grease to accumulate. You just sweep and mop the flat surface.

    You can also apply it directly to kitchen worktops and central islands. A microcement kitchen island becomes the focal point of the room. It looks like a solid block of poured concrete but weighs a fraction of the amount. The polyurethane sealers applied at the end of the process protect the surface from cooking stains. Olive oil, coffee, and wine wipe off completely if you clean them up promptly. The surface also resists the heat from warm plates and mugs, though you still use a trivet for boiling pans straight from the oven.

    Waterproof Bathrooms And Wet Rooms

    Bathrooms represent the most popular application for this material. A traditional bathroom requires silicone sealants and grout. Over time, moisture gets trapped in the grout, causing black mould to grow. You have to scrub it constantly. Microcement eliminates grout entirely.

    Because products like Aqua Quartz are fully waterproof, you apply them directly inside the shower enclosure. The water hits the wall and runs straight down to the drain. The installer shapes the floor to create the correct fall for the water to drain away properly. You can even coat the bathroom sink and the vanity unit in the exact same material as the walls. This creates a striking, minimalist wet room. It is completely hygienic because there are no hidden gaps for bacteria to breed.

    Using Microcement For Outdoor Spaces

    The material performs just as well outdoors as it does indoors. Exterior surfaces face harsh conditions, including driving rain, freezing winter temperatures, and intense summer sun. Mediterranean microcement uses UV-stable pigments. This means the colour will not fade or turn yellow when exposed to direct sunlight for years.

    You use it to connect your indoor and outdoor spaces. You apply the exact same colour on your kitchen floor and continue it straight out onto your garden patio. When you open your bifold doors, the house flows seamlessly into the garden.

    Weather Resistance On Patios And Terraces

    Outdoor patios require a material that survives the freeze and thaw cycle. In winter, water enters porous stones and freezes. The ice expands and cracks the stone. Microcement is non-porous when correctly sealed, and the waterproof versions repel the water entirely. Water cannot penetrate the surface to freeze inside it.

    Safety is also a primary concern for outdoor floors. A smooth indoor finish becomes very slippery when it rains outside. The installer fixes this by mixing anti-slip additives into the final coats of the patio surface. These microscopic granules give the floor a slight grip. This works perfectly to prevent slipping in wet weather while remaining easy to clean.

    Coating Swimming Pools And Water Features

    Swimming pools traditionally use small glass mosaic tiles. Eventually, the chemicals and the water pressure cause these tiles to detach. You then have to drain the pool and re-tile it. Microcement offers a permanent, jointless alternative for swimming pool basins.

    The continuous surface looks spectacular underwater. The water reflects the subtle trowel marks and creates a beautiful, natural aesthetic similar to a stone lagoon. The material resists the harsh chlorine or salt water used to keep the pool clean. You apply it directly over the old pool shell. This completely updates the look of an old swimming pool without heavy excavation or concrete pouring.

    The Application Process And Timeframes

    Installing this material requires training, precision, and strict adherence to the manufacturer’s guidelines. It is not a quick weekend project for an amateur. The process takes time because each layer must dry and cure before the next layer goes on.

    A standard room, such as a bathroom or a kitchen floor, takes between four and five days to complete. The time is spent waiting for the materials to dry, rather than physical labour. Understanding the steps helps you plan your renovation schedule effectively.

    Preparing The Existing Surfaces

    Preparation is the most critical part of the entire installation. The microcement simply follows the shape of the wall or floor beneath it. If the floor is uneven, the installer levels it first with a self-levelling compound.

    The installer cleans the existing surface thoroughly to remove all dust and grease. They then apply a liquid primer. This primer makes the surface sticky and ready to receive the cement. Next, they roll out a flexible fibreglass mesh across the entire area. They trowel a coarse base coat of microcement over the mesh. The mesh acts like a skeleton. It holds the base coat together and stops any cracks in your old floor from transferring through to the new surface. Once this base coat dries, they sand it smooth.

    Applying The Layers And Final Sealant

    After the base structure is solid, the aesthetic work begins. The installer applies two thin coats of fine microcement. This is where you choose your specific finish and colour. They use smooth metal trowels or flexible plastic trowels to create the exact texture you want. They let each coat dry and then sand it very lightly to remove any sharp edges.

    The final step protects everything. The installer applies a pore-sealing liquid, followed by two coats of polyurethane varnish. You choose whether you want a matte, satin, or gloss finish. The varnish cures over the next week. You can walk on the floor in your socks the next day, but you wait a full seven days before moving heavy furniture back into the room. This gives the chemical resins the time they need to harden completely.

    Long Term Maintenance And Care Requirements

    People often worry about how to clean and maintain a seamless floor. The reality is that maintaining microcement requires less effort than maintaining natural wood or traditional stone. The polyurethane sealer acts as a protective shield. Dirt and spills sit on top of this shield. They do not penetrate the cement.

    Treat the surface similarly to a solid oak floor. You do not leave puddles of water sitting on it for days, and you protect it from sharp, heavy impacts. Following a simple routine ensures the finish looks brand new for decades.

    Daily Cleaning Routines That Work

    Your daily cleaning routine is very simple. You sweep the floor with a soft broom or vacuum it with the brush attachment extended. This removes dust and grit. Grit acts like sandpaper under your shoes, so removing it prevents the varnish from wearing down over time.

    For washing, you use a PH-neutral floor cleaner mixed with warm water. You mop the floor and let it air dry. You strictly avoid bleach, ammonia, and harsh acidic cleaners. These strong chemicals eat into the polyurethane varnish. If you destroy the varnish, you remove the protective layer, and the floor becomes vulnerable to stains. A gentle soap is all the surface ever needs to stay perfectly clean.

    Protecting The Surface From Damage

    Prevention stops damage before it happens. You attach thick felt pads to the bottom of all your dining chairs, tables, and sofas. When you pull a chair out, the felt glides across the floor safely. You never drag heavy appliances like washing machines or fridges across the floor. You lift them or place them on protective sliding boards.

    If you accidentally drop a heavy hammer and chip the floor, it is not the end of the world. A trained installer can repair the damage. They sand down the damaged patch, apply a small amount of new material, and reseal it. The repair blends back into the textured surface. This makes the material highly practical for busy homes. It handles real life effortlessly.

  • How to Upgrade Your AI Prompts from “Chatbot” to “Digital Staff”

    How to Upgrade Your AI Prompts from “Chatbot” to “Digital Staff”

    Most people treat AI like a slightly smarter search engine. They ask a basic question and get a generic answer.

    To get professional results useful for agency work or business growth, you need to shift your mindset. Stop treating the AI like a chatbot and start treating it like a specialised employee.

    If you hired a new junior strategist, you wouldn’t just say, “Write a marketing plan.” You would give them a specific role, context about the client, a required methodology, and a list of things to avoid.

    You need to do the same with your prompts. Here is a practical framework for writing prompts that yield usable, high-quality output.

    1. Define the Niche, Not Just the Role

    Giving the AI a persona is a common tactic, but generic roles lead to generic results. Asking the AI to act as a “Marketing Expert” is too broad. It will provide surface-level advice that sounds okay but lacks substance.

    To get expert-level output, you must define a specific niche and a proven methodology.

    Instead of this:

    “Act as a marketing expert and write an ad for my service.”

    Do this:

    “Act as a Direct-Response Copywriter focused on B2B lead generation. Write three variations of a LinkedIn ad using the ‘Problem-Agitation-Solution’ framework. The target audience is CTOs at mid-sized tech companies.”

    By specifying the niche (Direct-Response B2B) and the method (Problem-Agitation-Solution), you force the AI to use established professional structures rather than just writing “friendly” text.

    2. Set Negative Constraints (The “Don’t” List)

    AI models are trained to be helpful and agreeable. Unfortunately, this often results in copy that sounds overly enthusiastic, repetitive, or full of marketing hype.

    To ensure professional output, you must tell the AI what to avoid. Think of these as brand guidelines. Negative constraints often improve output more effectively than positive instructions.

    Add these constraints to your prompts to cut the fluff:

    • “Do not use hype words like ‘unleash,’ ‘elevate,’ ‘game-changer,’ or ‘tapestry.’”
    • “Keep the tone direct, professional, and objective.”
    • “Maintain an 8th-grade reading level. Short sentences only.”
    • “Do not offer moralizing conclusions or wrap-up summaries at the end.”

    3. Turn Monologues into Dialogues

    A common mistake is trying to get a complex result in a single, massive prompt (“one-shot prompting”). For professional tasks, this rarely works well.

    Instead, structure complex requests as a multi-step conversation.

    If you need a content strategy, don’t ask for the final strategy in the first prompt. Ask the AI to act as a strategist and first provide a list of five clarifying questions it needs answered about your budget, audience, and goals.

    Answer those questions, then ask it to generate the strategy based on your new inputs. This “human-in-the-loop” approach ensures the final output is actually relevant to your specific project constraints.

    4. Demand Contrarian Perspectives

    When you ask AI for ideas, it usually provides the most probable or popular answers based on its training data. This is useful for standard tasks, but terrible for creative differentiation. It leads to echo-chamber results.

    If you are brainstorming strategy or content angles, you need to push the AI off the beaten path. Explicitly ask for wildcards.

    Try adding these lines to brainstorming prompts:

    • “After providing standard options, provide one ‘contrarian’ viewpoint that goes against common industry wisdom.”
    • “Identify an angle that our competitors are likely ignoring because it seems too niche or difficult.”

    Summary Checklist

    Before hitting enter on an important prompt, ensure you have included:

    1. A specific niche role (e.g., “Senior WordPress Security Specialist”).
    2. Context (Background info on the project).
    3. Negative constraints (What to avoid to keep the tone professional).
    4. An iterative step (Asking for an outline or questions first, rather than final output).

    Try my Structured Prompt Building Wizard